

best cricut for making shirts
These Cricut shirts for girls are adorable designs for baby girls and beyond! Learn how to make shirts and onesies with your Cricut machine using different materials. You can find Cricut shirt ideas for boys here. This post contains affiliate links. Some product was received free of charge for posting purposes.
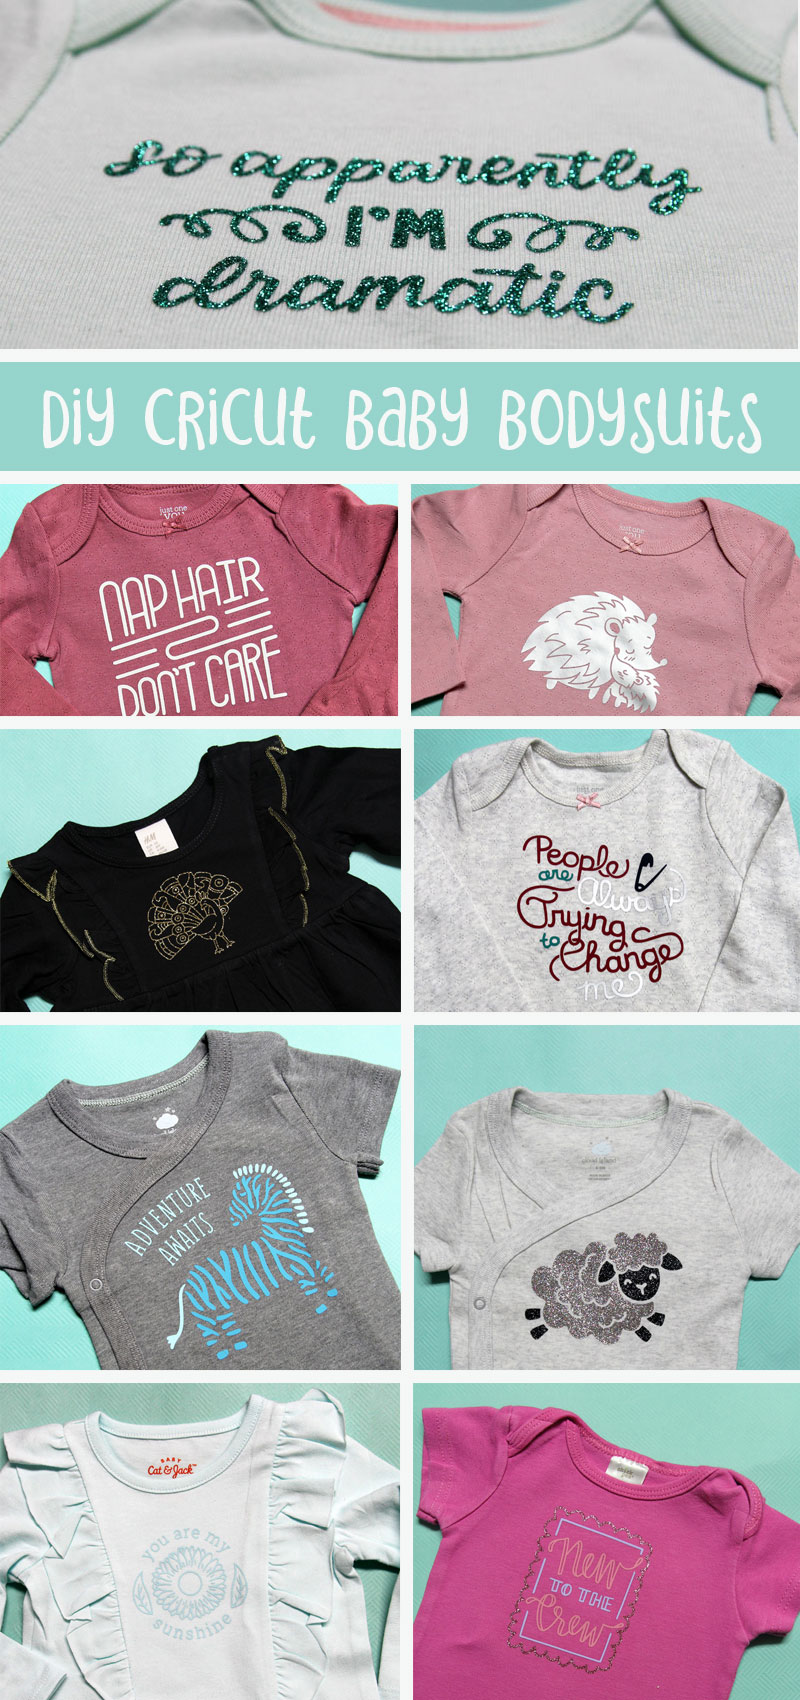
Table of Contents:
- The best materials for making Cricut shirts for Girls
- Different types of Iron-on vinyl/HTV used on these Cricut shirts for little girls
- Which bodysuits to use for Cricut shirts for girls
- Setting up your design
- Design Tips for prettier Cricut shirts for Girls
- Setting things up in Design Space
- Materials and tools
- How to make Cricut Shirts for Girls
- Basic steps for making shirts with your Cricut
- Layering Cricut shirts
- Tips for using glitter iron-on
- How to make Shirts using Infusible Ink Markers
- Cricut Shirts for Girls Ideas
- For baby girls
- Neutral
- For girls of any age
- More cool Cricut crafts
For some people, preparing for a new baby means organizing and cleaning, freezer-filling, and nursery decorating.
For others ( 😉 ) it means crafting.
These Cricut shirts for girls were those I made during my third trimester and my maternity leave after Princess A graced us with her presence.
I made some of these ahead so I didn't manage to photograph all of them on her, but I hope you enjoy the pudgy cuteness in those that I did take on her, and the clever design of these Cricut shirts for girls.
The majority of these are Access designs. I've been using Access designs a TON these past few months and it's definitely paid off for us, but you can read a more well-rounded review and make your own judgement in this post where I answer the question – is Cricut Access worth it? – in depth.
There are also a few that I designed for Princess A, and one that I offer a free SVG for.
And as you can see, some of these are really good for boys and girls and for girls of all ages – but since I made them for my baby girl, I'm calling them baby girl shirts.
I decided to focus this post on teaching you how to decorate baby onesies and bodysuits with your Cricut to make really cute outfits. I included information to help you choose your materials, your "blanks" (the item you're decorating) as well as full instructions using iron-on materials and Infusible Ink markers.
The best materials for making Cricut shirts for Girls
Below, I discuss the different types of blanks and iron-on materials you might want to use. Which one you use will depend on your skill level as well as, of course, style preferences.
Different types of Iron-on vinyl/HTV used on these Cricut shirts for little girls
HTV is Heat Transfer Vinyl – a vinyl material that adheres permanently after being activated with heat by pressing. It comes in different textures and colors. Cricut calls theirs Iron-on. You can get these as individual colors or sample packages with a few colors.
Glitter:
Glitter iron-on is notoriously hard to weed but very forgiving when ironing on. The trick to making it easier to weed is to use enough pressure. This varies by machine so play around with a sample first.
I LOVE using glitter iron-on for baby girl shirts as it adds a little sparkle and texture. Once I mastered my cut settings, this became my favorite as we got over those weeding hurdles.
In this post I used:
- Glitter Iron-on Sampler Bejeweled
- Glitter Iron-on Sampler Basics
- Glitter Iron-on Princess Sampler

Foil:
Foil is the polar opposite of glitter. It's super easy to weed and not very forgiving when ironing on. Make sure to follow the directions given in the Cricut heat guide to the freakin' T so you don't burn it.
In this post I used Foil Iron-on Sampler Sequin
Everyday Iron-on:
As it sounds, this is "regular" iron-on. I recommend getting a few samplers with color palettes you like to have handy, plus some neutrals as individual colors. You can base the samplers you choose off your designs or base your designs off color palettes that you liked.
Some neutrals are interchangeable. For example, in some designs, I like to use Clay, which is a very pale beige, instead of white.
In this post I used:
- Cricut Everyday Iron-On Martha Stewart Seaside Collection
- Everyday Iron -On Sampler, Pastels
- Everyday Iron -On Sampler, Boho
- Everyday Iron-on Black and Clay
Metallic Everyday Iron-on:
Everyday iron-on also comes in metallic shades. This is different from foil – it has more of a subtle, matte finish. It also works at different heat settings than foil, since it's Everyday Iron-on, and works as such.
In this post I used Everyday Iron-On Martha Stewart Metallics Collection
Infusible Ink markers:
These markers are like magic – color/draw (with your Cricut or by hand) on regular copy paper and then transfer the design to your high-polyester-count blank (more on that soon). The design dyes the fibers of the bodysuit, for a really cool effect.
You can buy Infusible Ink sheets (I talk more about that here) but in this post I used the markers. Markers are more cost-effective and give you a huge color palette without taking up your own home. They do have a certain look to them, which can be so cool, but you have to like it.
Keep in mind your design will be flipped!
In this post I used Infusible Ink markers from this pack. I recommend having a good color palette handy if you plan to do Infusible Ink marker projects regularly. They also come in a thinner .4 mm size.
Which bodysuits to use for Cricut shirts for girls
My favorite bodysuits to "Cricut" are hand-me-downs! They are a fantastic way to add a little life and are naturally the cheapest, even if you're buying them second hand.
But if you're setting up a decorating station at a baby shower, you'll definitely want new ones. And maybe even just to keep things fresh for yourself and to add to what you have.
At first, I stocked up on white bodysuits. The truth is, as I go along, I learn more things. One of those is that white blanks just aren't as pretty! They worked for some designs but not all.
For Infusible Ink, you kind of need white. First of all, you need high polyester content or your colors won't take/will fade. Also, the way it works is that the color is absorbed into the material. That means that you're adding color, not replacing existing color. Add color to black and you see nothing. Add yellow to red and you'll also hardly see it. Other colors also don't show up that well. So white is ideal for Infusible Ink, and you'll want to stick with the Cricut blanks.

White Gerber Onesies and Carter's bodysuits are great for when no color seems to be suiting your needs. They're also fantastic for larger, more colorful designs that take over more.
Otherwise, these that I got from Target are much better. I'll be personalizing some and leaving others as is. They are really inexpensive. In general, Target seems to have a good selection of affordable bodysuits for making your own Cricut shirts for girls. Printed and colorful bodysuits are often seasonal so if you don't see the ones I used, just shop around!

Be wary of bodysuits with texture – it's much harder to get your design to stick. You'll need high heat and a lot of pressure. I used these on some designs and they did okay, and look great, but are definitely harder to work with.
And finally, I got some ruffled bodysuits and dresses that have a smaller blank front to put on fine, monochromatic coordinating designs. They also require heavy pressure unless you have an EasyPress that's smaller and fits between the ruffles. But they came out SO good and look more like a complete outfit!
Setting up your design
I do my design setup when I need to relax and I'm not up to physically crafting. Here are some tips for making your baby girl shirts look fantastic.
Design Tips for prettier Cricut shirts for Girls
The most important two factors in getting your design right:
- Sizing
- Color combo.
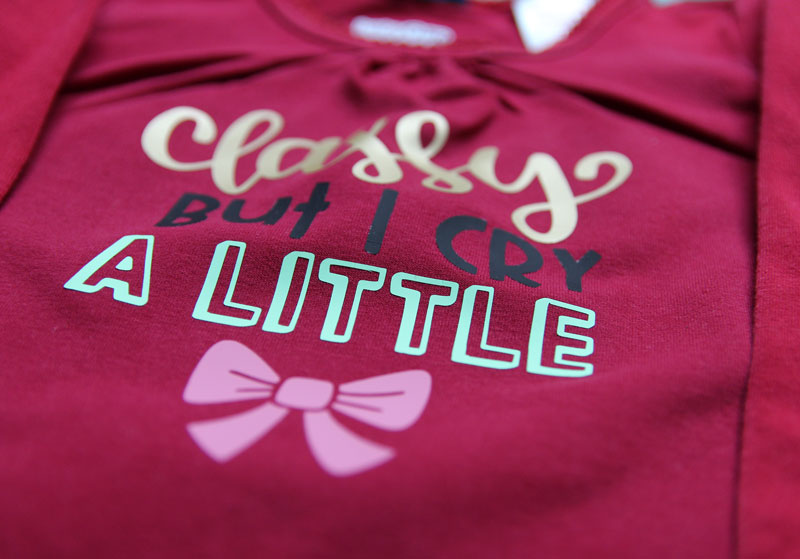
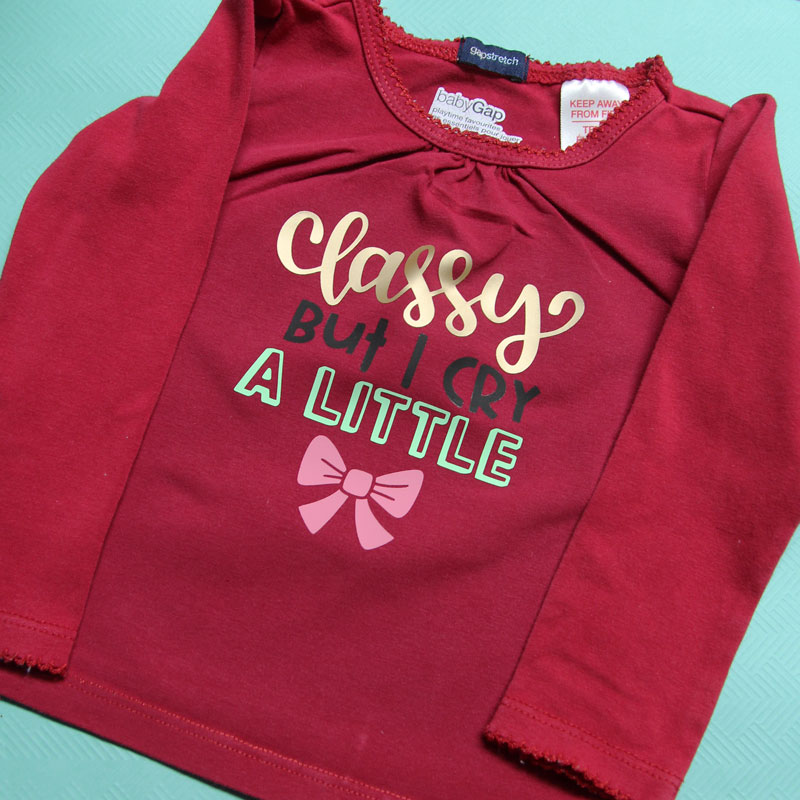
I don't love how my "Classy but I cry a little" shirt came out. It's too much for a bright shirt.
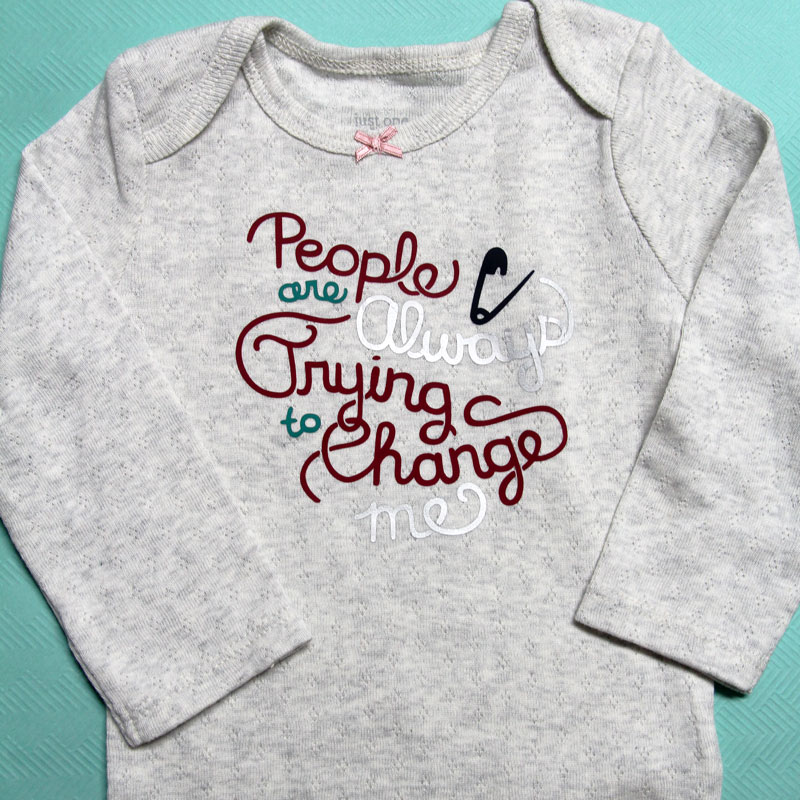
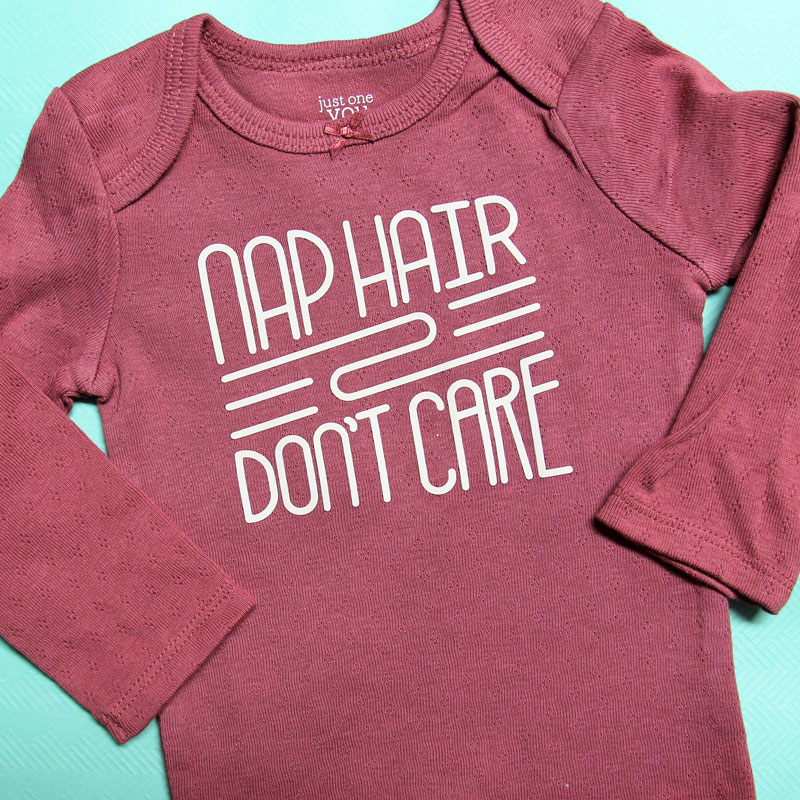
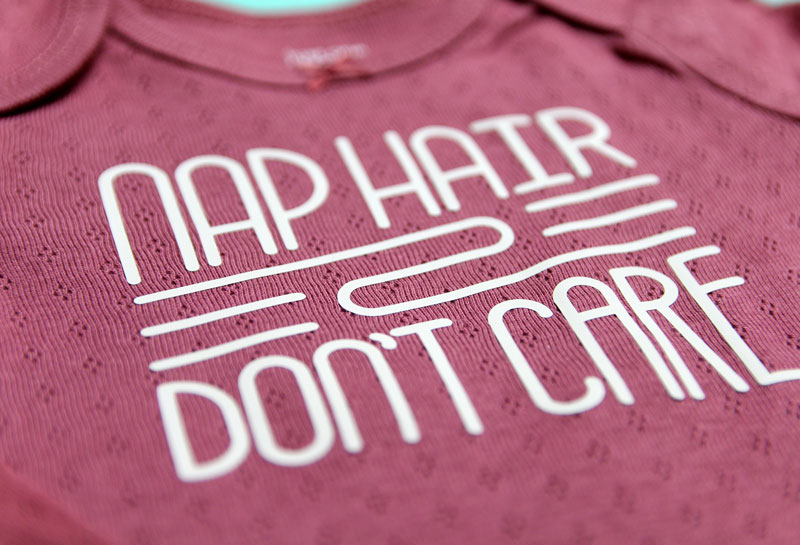
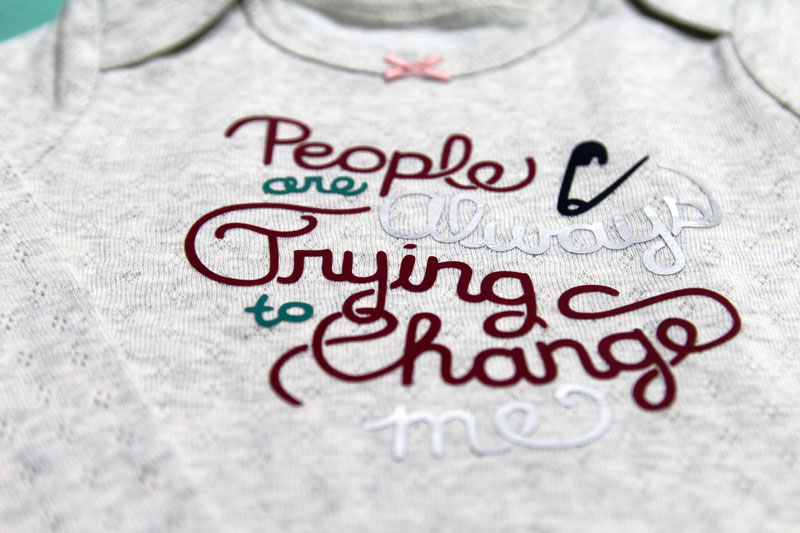
Knowing when to stick to one color and when to make it colorful is key. "Nap hair don't care" and "People are always trying to change me" are the perfect examples.
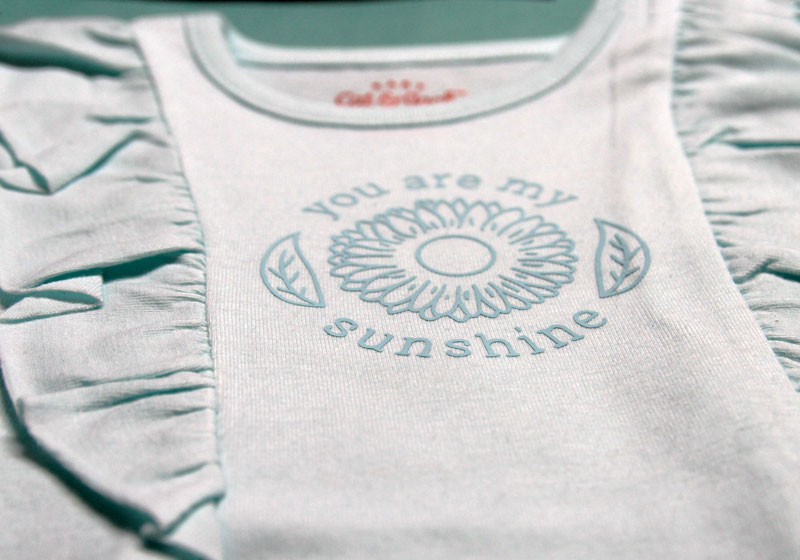
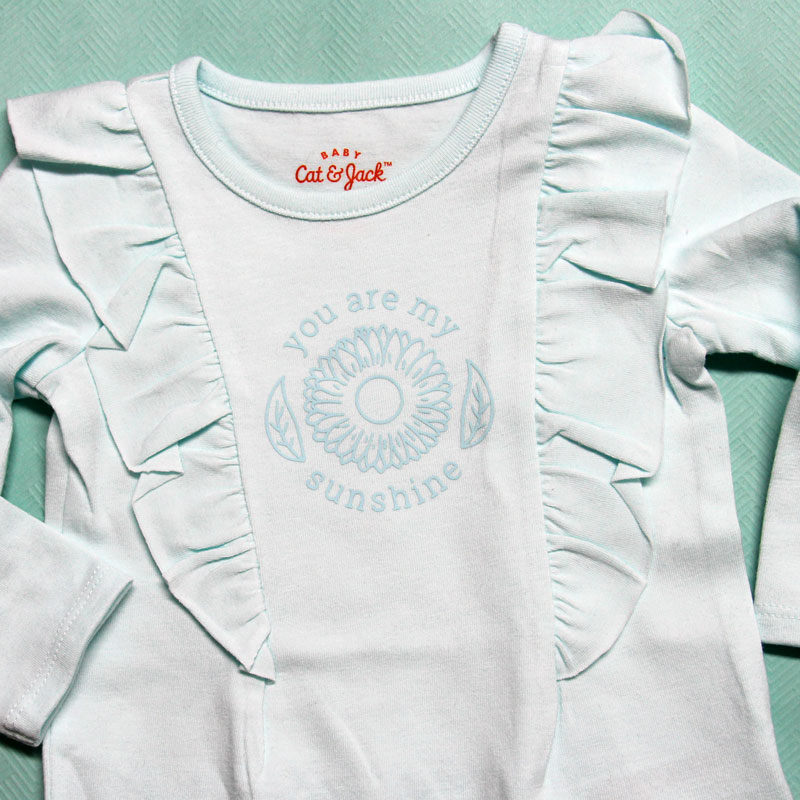
Another great color tip is when you want things subtle, choose a very similar shade of the same color. My "You are my sunshine" shirt has that blue-on-blue textured look that is so beautiful.
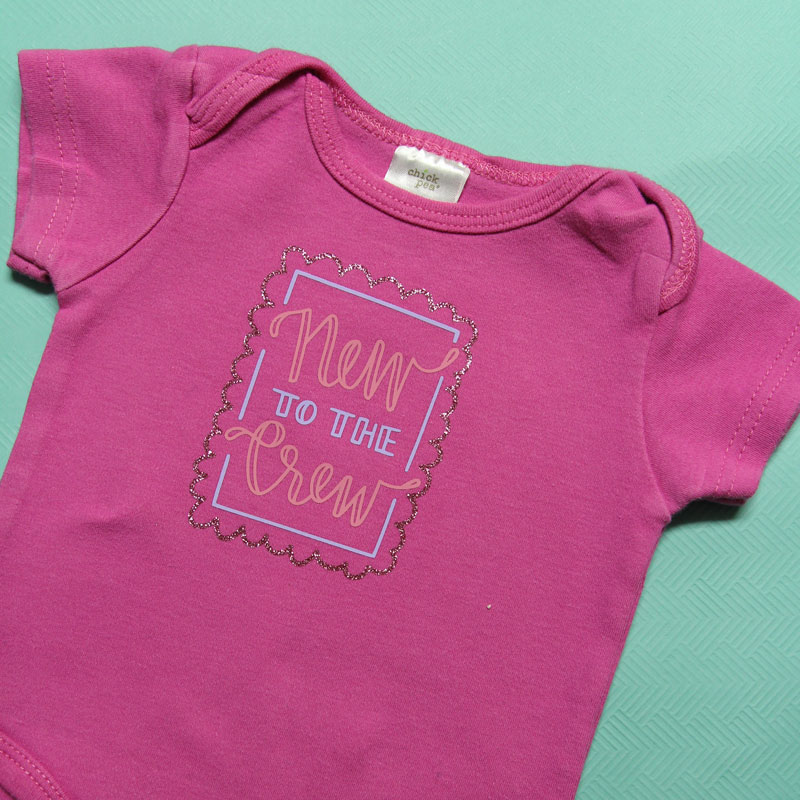
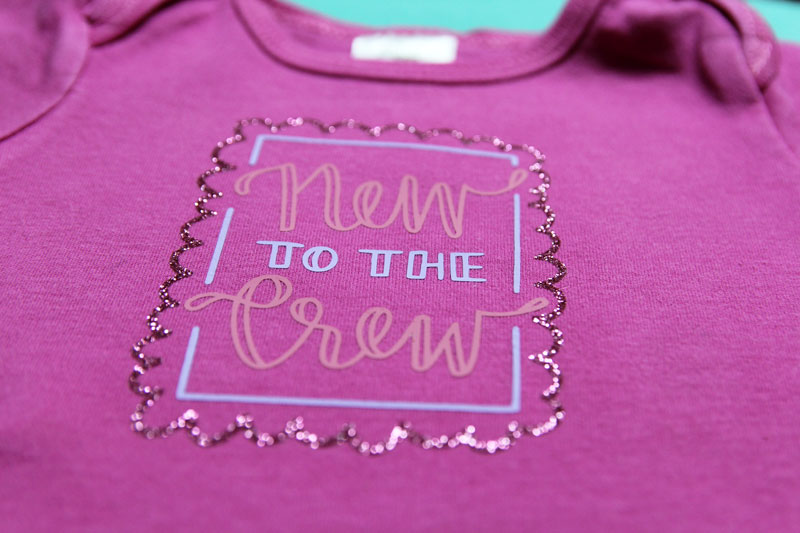
Consider mixing up your textures. "New to the Crew" has a glitter border that adds a little sparkle without overdoing it. This shirt is very bright, just like the red one above, but came out better because I stuck to a simpler color palette.
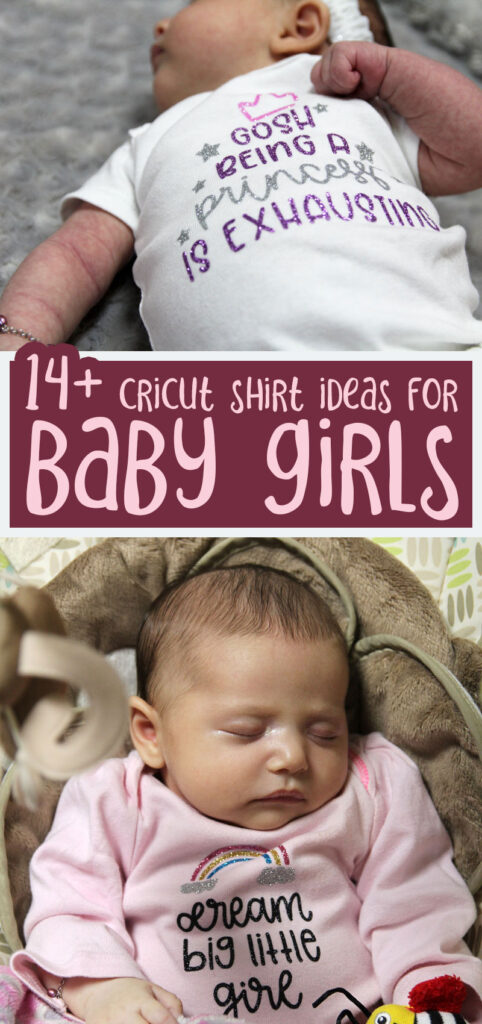
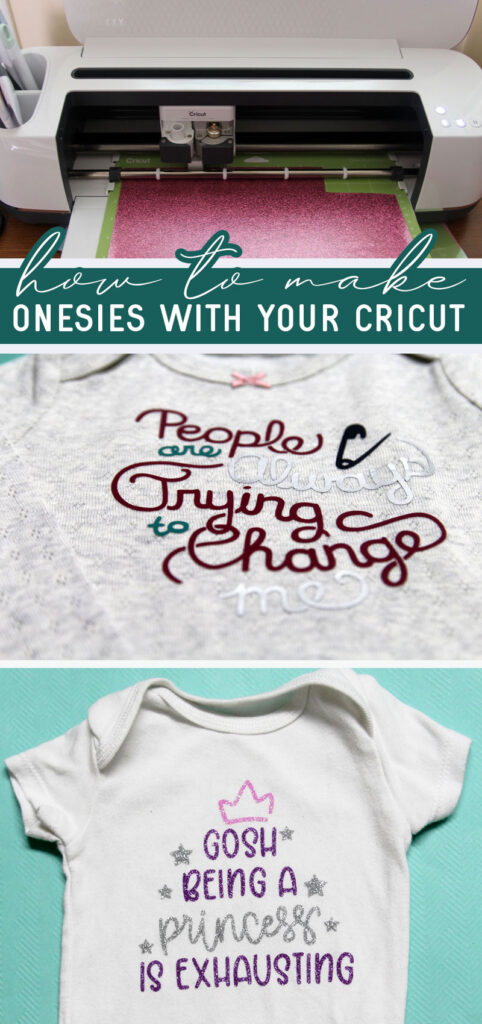
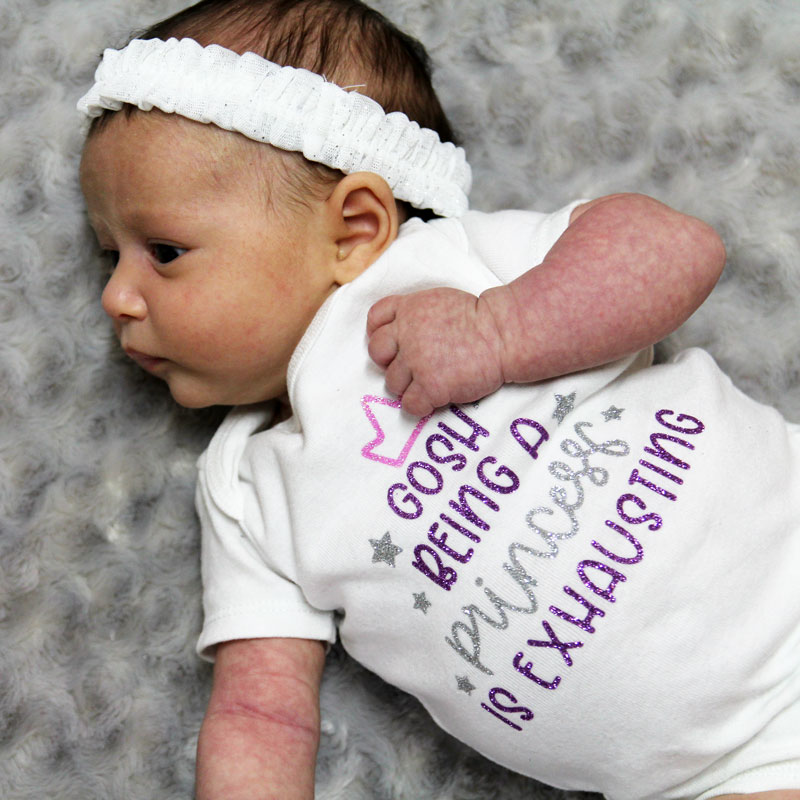
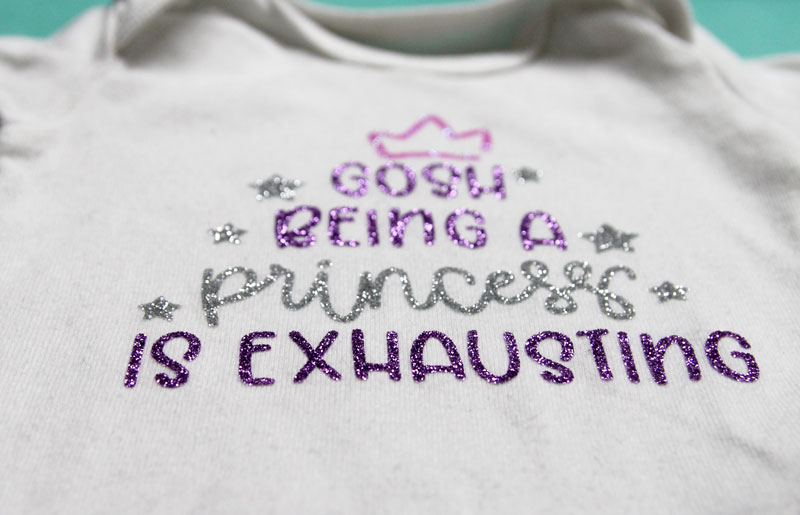
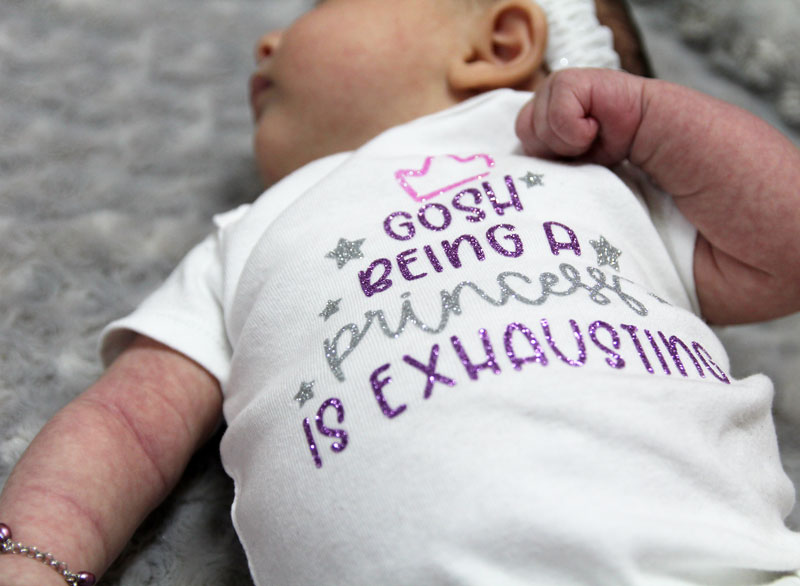
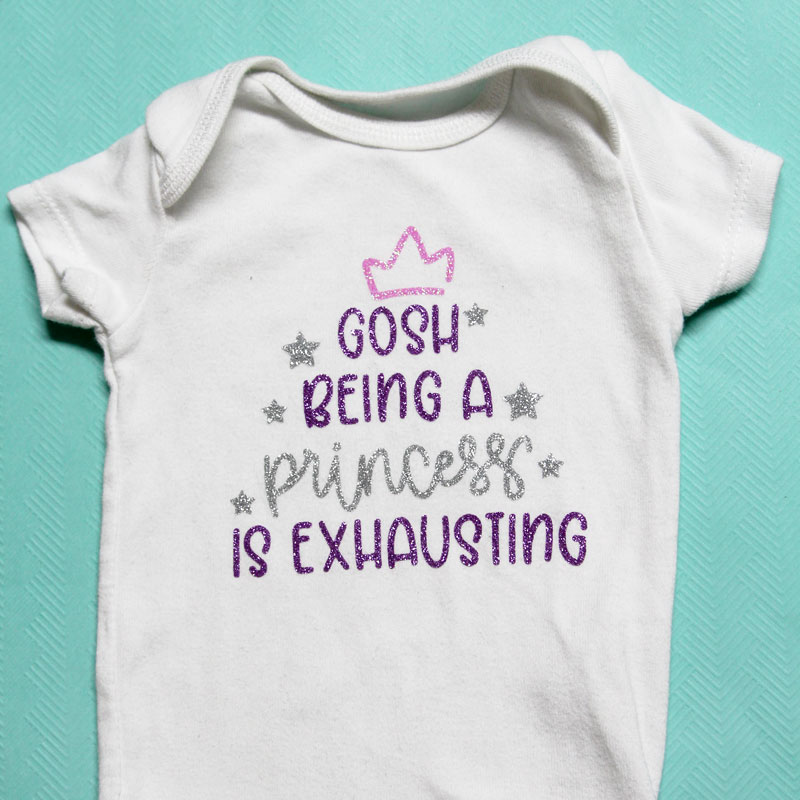
And sometimes doing a design completely in glitter looks amazing. I wasn't sold on the "Gosh, being a princess is exhausting" design, until I saw it glittering on my little princess as she slept and now it's one of my favorites…
As for sizing: that one's a bit complex because there's no one size fits all. I've seen people give size guides but personally, I like to decide this on a shirt-by-shirt basis. "New to the Crew" (above) should have been a bit bigger.
A little bit of margin is good, and with shirts that have a lot of solid design, you want to keep it smaller or it starts looking like vinyl.
And finally, with wider, shorter designs, you'll want to make use of the width – but don't overdo it. Always leave at least an inch to the armpits.
Setting things up in Design Space
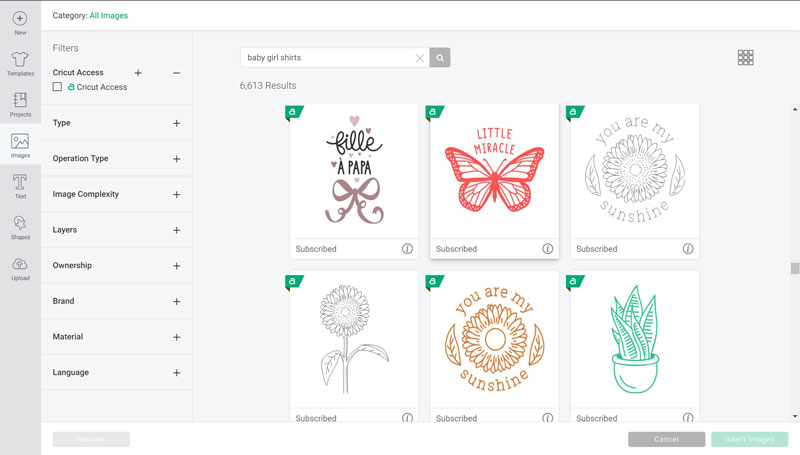
Create your project and hit "images". There are a few ways to look for what you want:
- I found a lot of these designs by searching "shirts for girls" and similar generic terms. You might need to scroll a bit before you find what you are looking for.
- You can go more specific, with searches such as "baby animal, princess, or little sister"
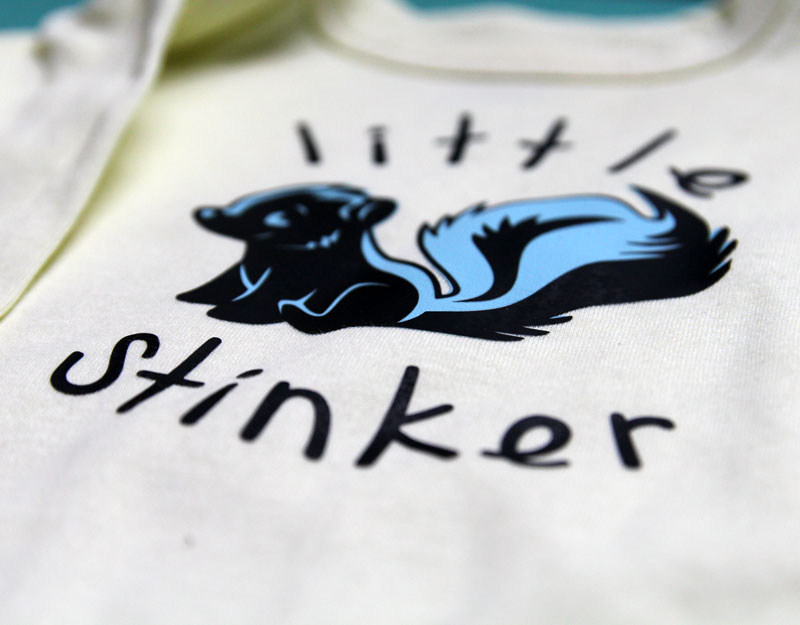
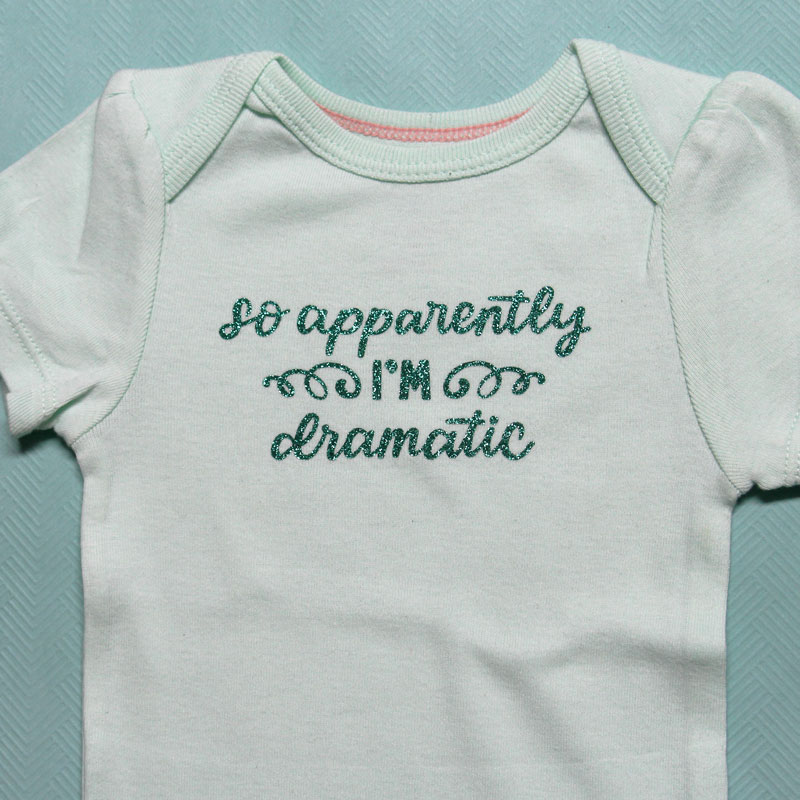
- You can also search for terms based on the shirts you see in this post. Search "little stinker, gosh being a princess, or apparently I'm dramatic"
- Finally, you can browse through image sets – there are a few that are full of baby shirt designs.
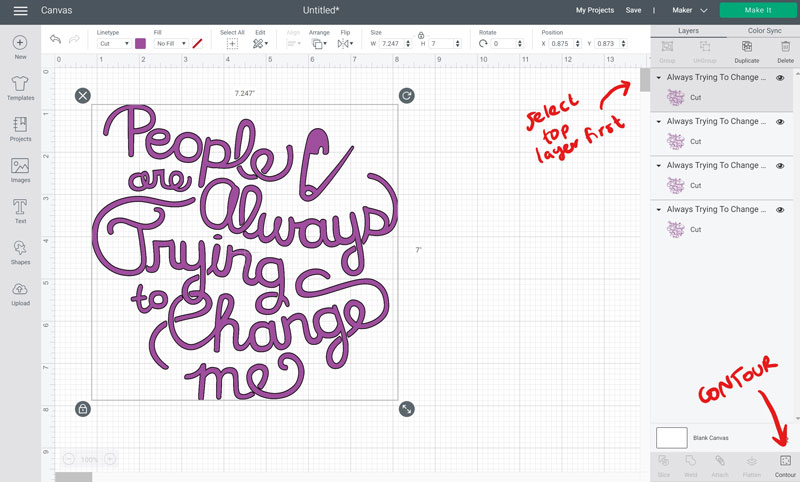
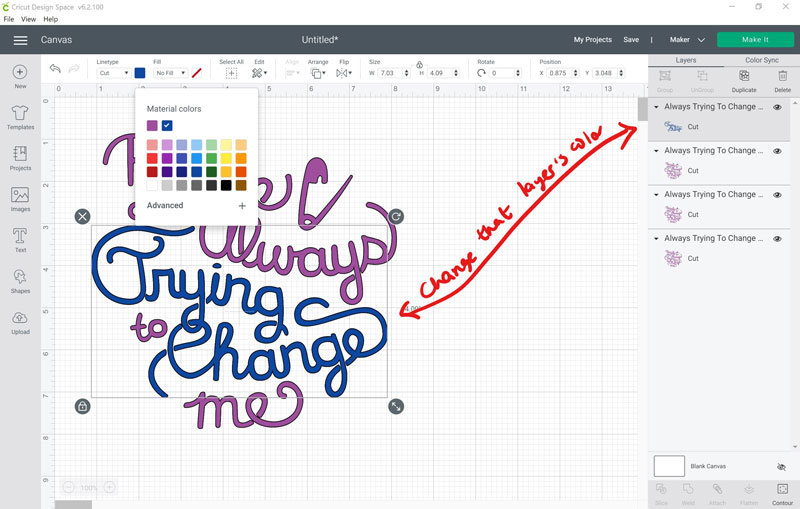
To turn a single colored design into multiple layers you'll want to "contour".
1. Duplicate your image as many times as the colors you want. If you want four colors, you'll have four layers.
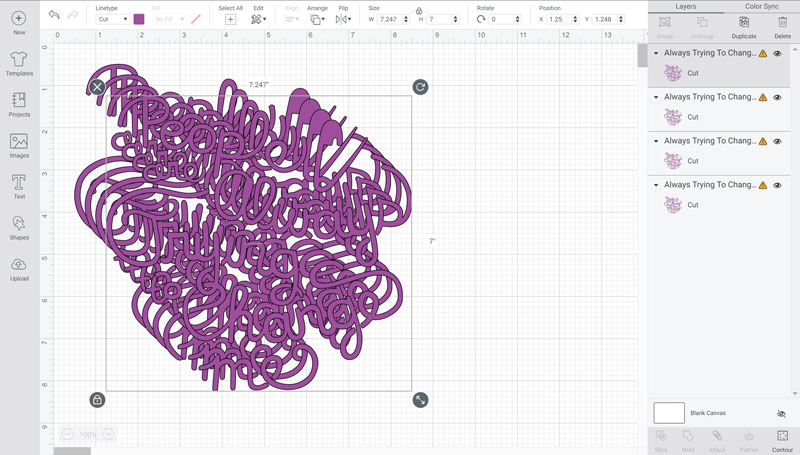
2. Select all and align them to each other horizontally and vertically.
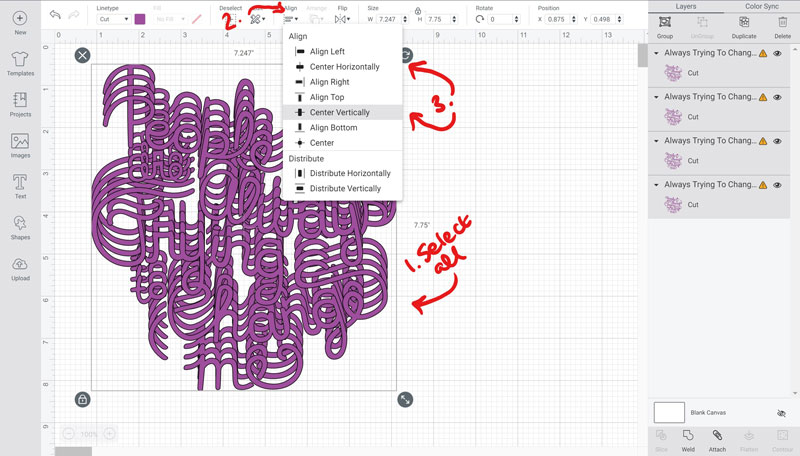
3. Contour each layer separately, only enabling the parts you want for that color. (Click on images to enlarge/scroll through them.)

Make sure to measure your bodysuit or shirt and resize your image before hitting "make it".
Besides for the materials listed above, you'll need the following to make Cricut shirts for girls.
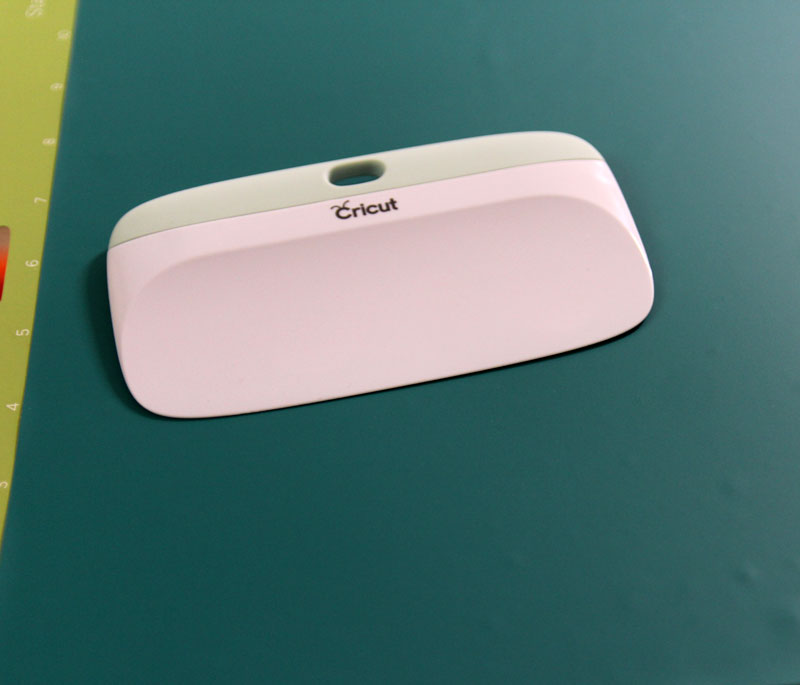
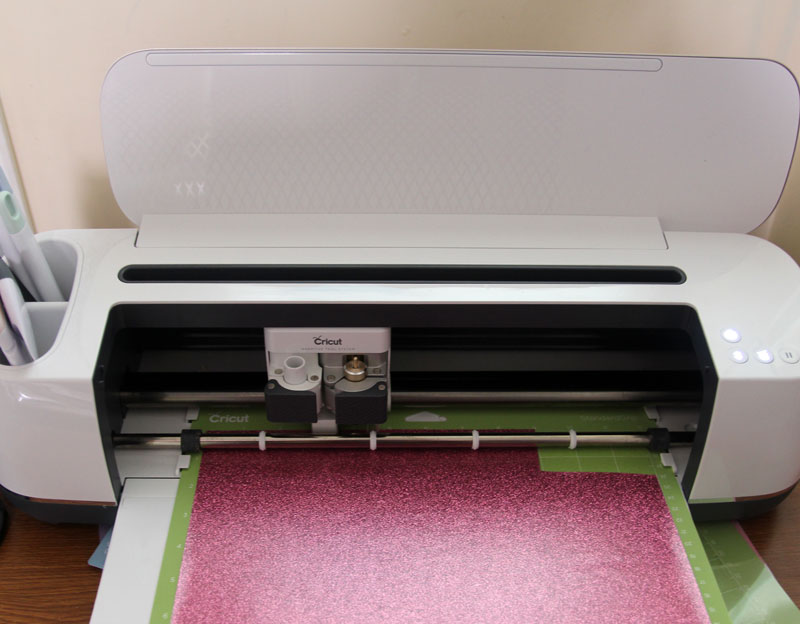
- Cricut Machine: Maker, Explore Air 2, or Joy (if you're sticking to smaller designs). I used the Maker for some and Joy for others.
- Green StandardGrip mat
- Fine Point Blade (you get one with your machine)
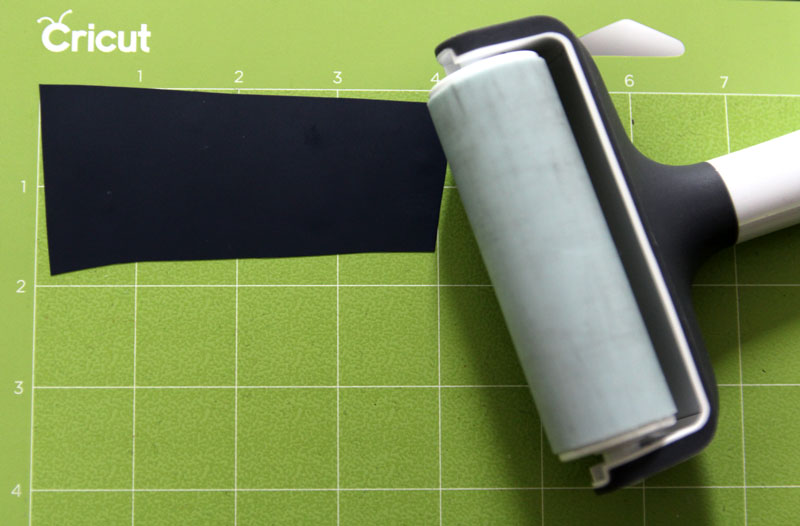
- Recommended: Brayer and/or XL scraper (the Brayer really sticks it well to the mat and the XL scraper is great for removing air bubbles and smoothing large sheets of iron-on onto your mat. But I rarely use both on one shirt)
- Basic tool set
- Cricut EasyPress 2. I have the 9×9.
- Cricut EasyPress Mat
- For Infusible Ink Marker shirts:
- Copy paper
- Blue LightGrip Mat
- Butcher paper
- Recommended: Heat Resistant Tape
- Recommended: a mason jar or similar to drop your vinyl waste into so it doesn't get all over
How to make Cricut Shirts for Girls
Basic steps for making shirts with your Cricut
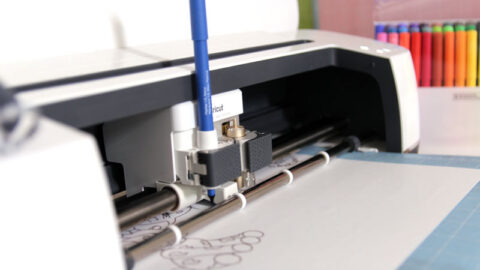
1. Set up your design in Design Space (see above). When you're done, click "make it." Use your scraper or brayer to adhere the iron-on well to the mat. Make sure it's shiny side down and that mirror is on for each Design Space mat.
For each color, look through your scraps first to see if you have a piece that's big enough. Baby bodysuits are so small, you can use scraps for lots of projects.
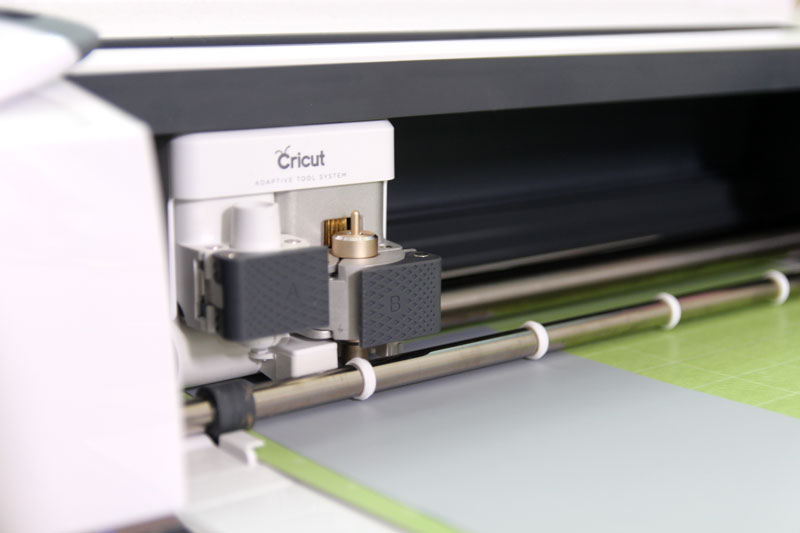
2. Load your machine and hit the C button to cut.
3. Unload your mat, remove the iron-on, design and weed – remove the outline.
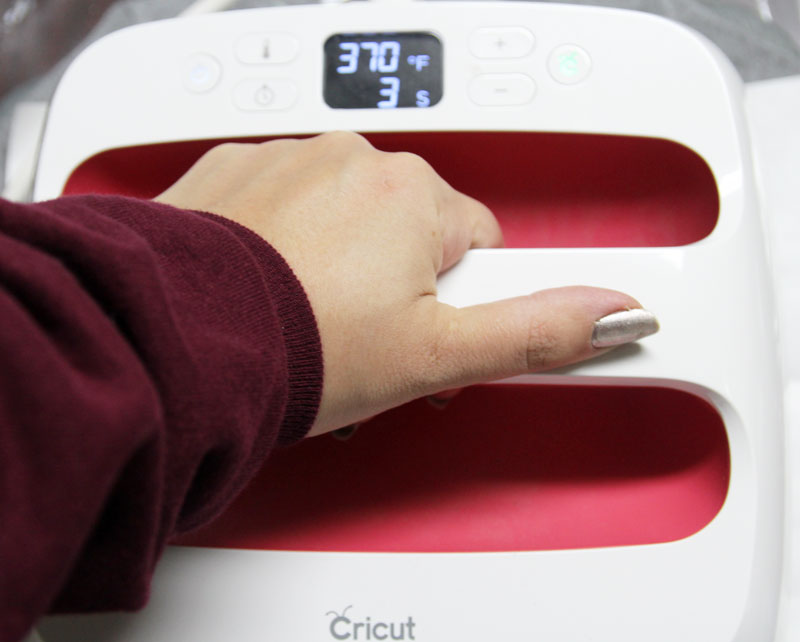
4. Place your bodysuit on your mat. Preheat for five seconds and then place your design on your bodysuit.
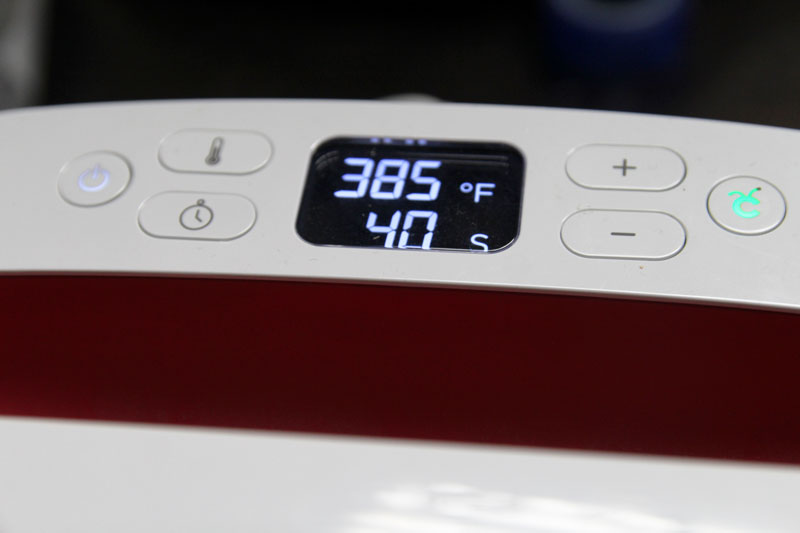
5. Use Cricut's Heat Guide to iron on your designs. If you're having trouble getting designs to stick (which can happen with textured bodysuits) try doing it on 370 for 10-15 seconds, with a sheet of butcher paper over your design so you don't ruin your shirt.
Layering Cricut shirts
There are two types of "layered" shirts – those with the colors separated enough to apply at the same time and those that you're better off doing in separate batches.
If they're separate enough, or you don't need to worry about placement, just trim the carrier sheet down and tape your parts in place with heat resistant tape and press as you normally would.
For shirts where the color overlaps, or the placement is complicated and you need the carrier sheet to help position the pieces do the following:
1. Weed your pieces, leaving the carrier sheet in place where you need it.
2. Layer the two pieces on top of each other as you need it to be for the design and position on your shirt. Remove the top layer(s) leaving only the bottom. Press for 10-15 seconds and let cool (if cool peel). Peel off the carrier sheet and position your next layer. Replace the first layer's carrier sheet so that all parts of the design are covered and press again for 10-15 seconds. Repeat with all layers.
Only use textured materials such as foil or glitter iron-on for the top layer.
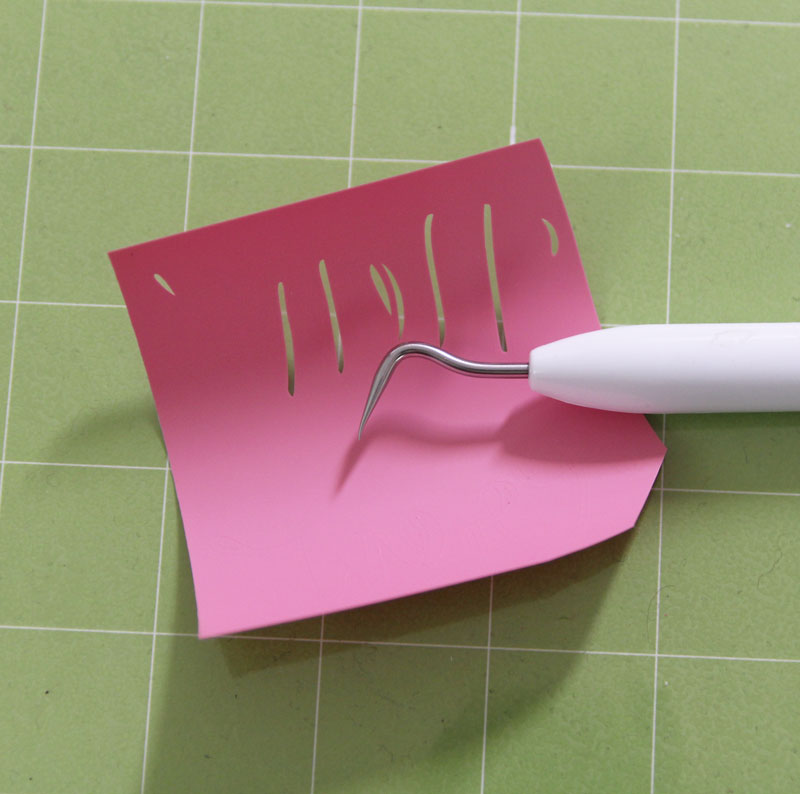
Tips for using glitter iron-on
Glitter can be challenging. A few tips:
- Use "more" pressure in your cut settings (and make sure you choose glitter iron on when cutting!)
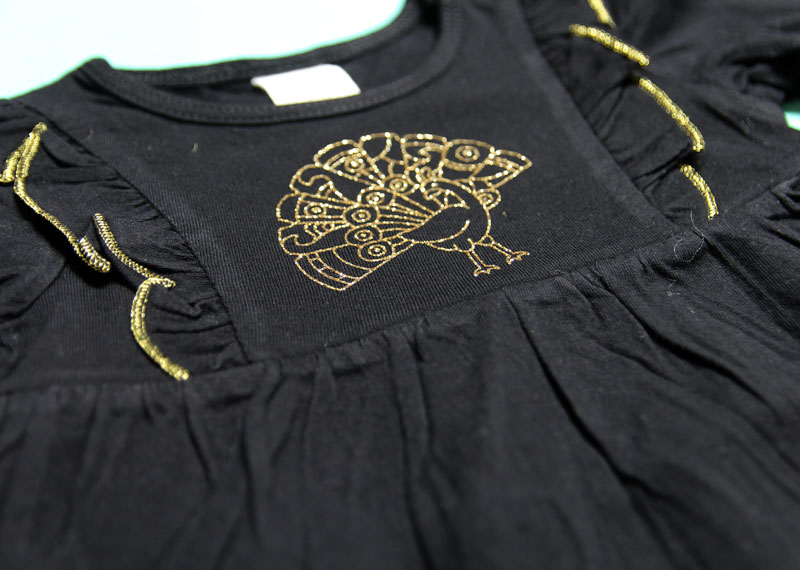
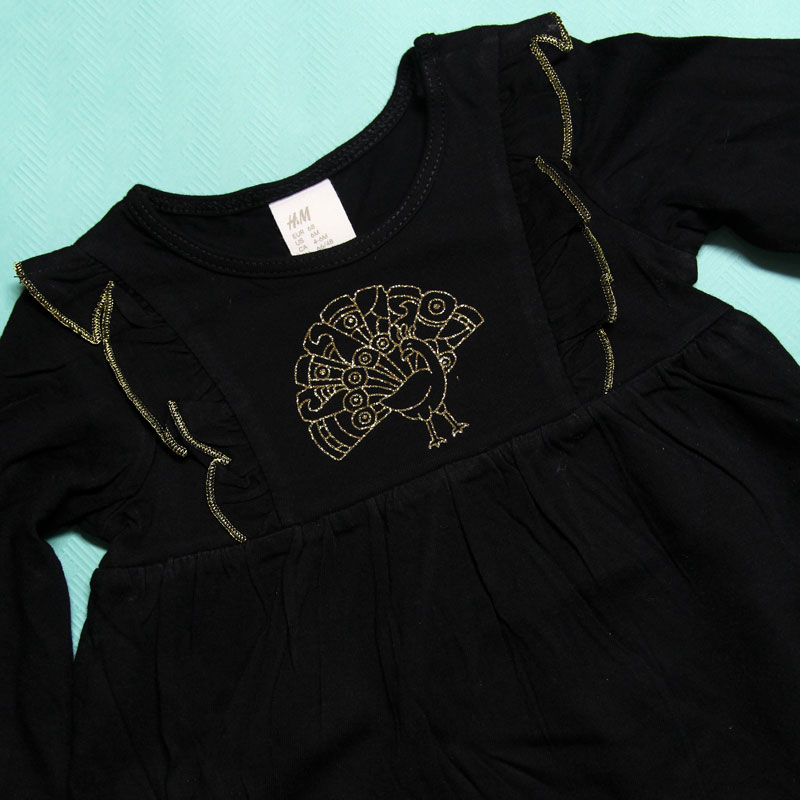
2. Avoid very complex designs if you're struggling. My peacock dress was brutal and I had to fake one of those dots after I lost it. But it's gorgeous and so worth using glitter regardless.
3. When weeding, good lighting is key. If you still can't see, gently bend your design backward and you'll see cracks where it cut to help guide you. Refer back to the design in Design Space when needed – keep it open when you work..
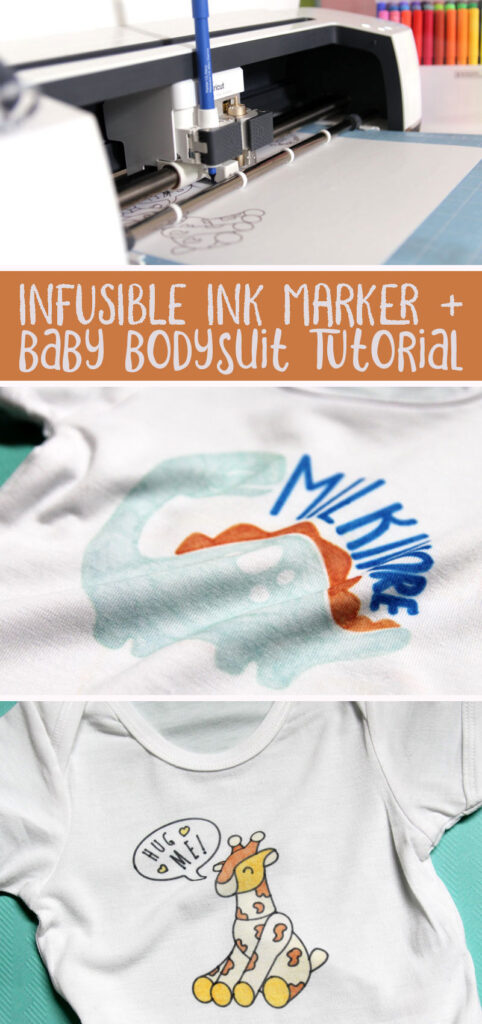
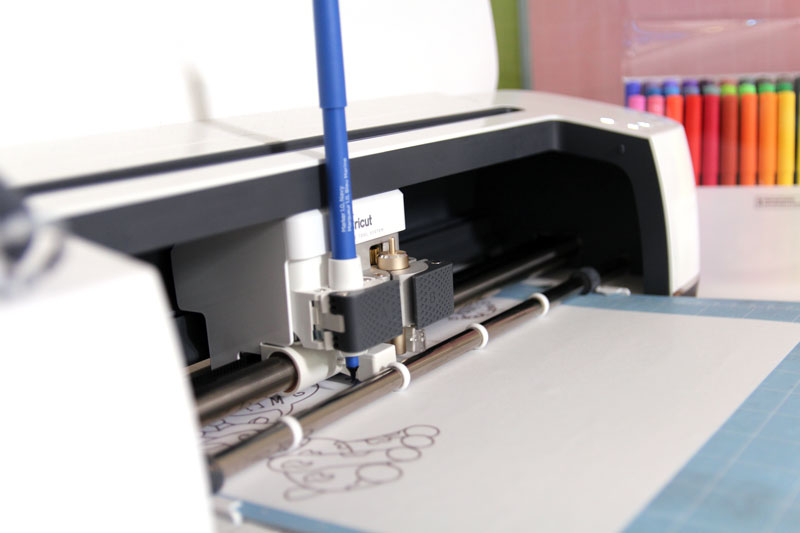
How to make Shirts using Infusible Ink Markers
Yes, you can literally iron any written design created with Infusible Ink Markers on copy paper onto a high polyester count shirt and it comes out gorgeous. Mind blown.
Just a note: I highly recommend making a test sheet for Infusible Ink markers so you have a good reference guide for your colors (if you plan to to use it regularly).
To do this – In Design Space, type the name of each color first, and set the line type to Draw. By the color panel, choose the marker weight, choose the right color, and write the name of that color using that color marker. Make it as you would any Infusible Ink marker color (write it mirrored on a piece of copy paper). Iron this onto a sample piece of polyester/high polyester fabric.
1. In Design Space, set your line type to draw (if it's not already a drawing image) and choose the right color. Follow the prompts, inserting the marker when you're ready and swapping colors as needed.
2. If you want, color in your design after you remove it from your mat (no need to weed).
3. Trim your design to size just enough so that you can place it correctly.
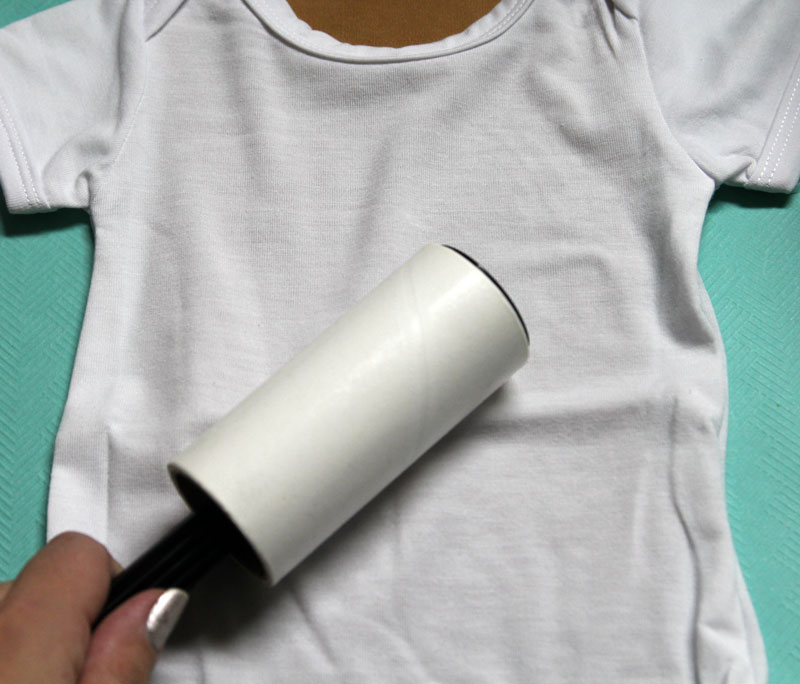
4. Place a piece of cardstock inside your shirt so that the design doesn't bleed to the back. Remove any lint from the front – it'll interfere with the ink transfer.
5. Tape your design in place using heat resistant tape.
6. Place your design on your Easy Press mat and place a sheet of butcher paper over it. Follow Heat Guide instructions to finish.
Cricut Shirts for Girls Ideas
Ready for specific ideas? Here are the ones I made and love! Design is linked if it's not an Access design. If it's Access, I made a note of that.
I tried to categorize them by baby girl, neutral, and any age girl, but of course there's overlap and personal taste to account for.
For baby girls
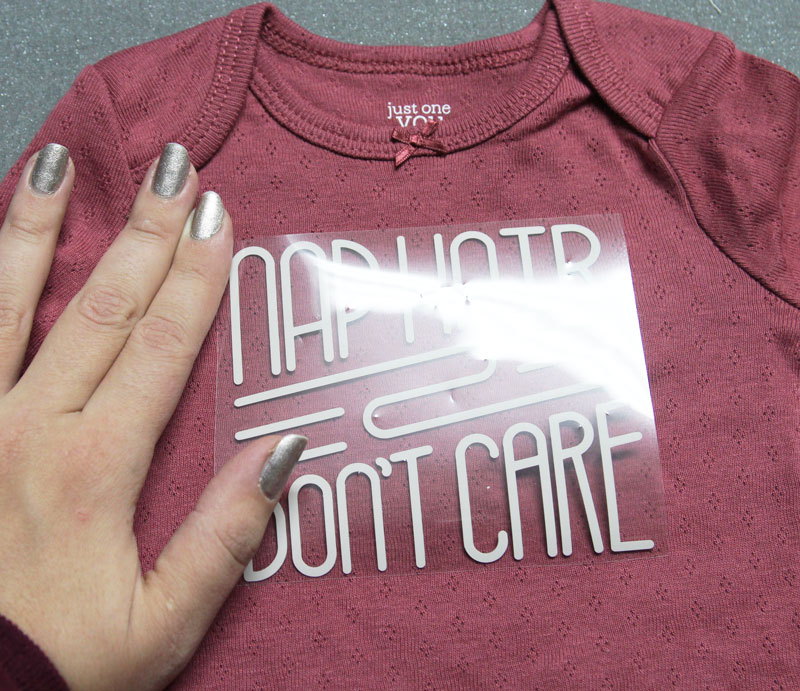
Nap Hair Don't Care:
- Bodysuit: Just One You by Carters from Target
- Iron-on: Everyday Iron-on Clay
- Design: Access
Classy but I cry a little:
- Shirt: Baby Gap (hand me down)
- Iron-on:
- Everyday Iron On Black
- Gold from the Cricut Everyday Iron-On, Martha Stewart Metallics Collection
- Mint from the Cricut Everyday Iron-on Martha Stewart Seaside Collection
- Pink
- Design: Access
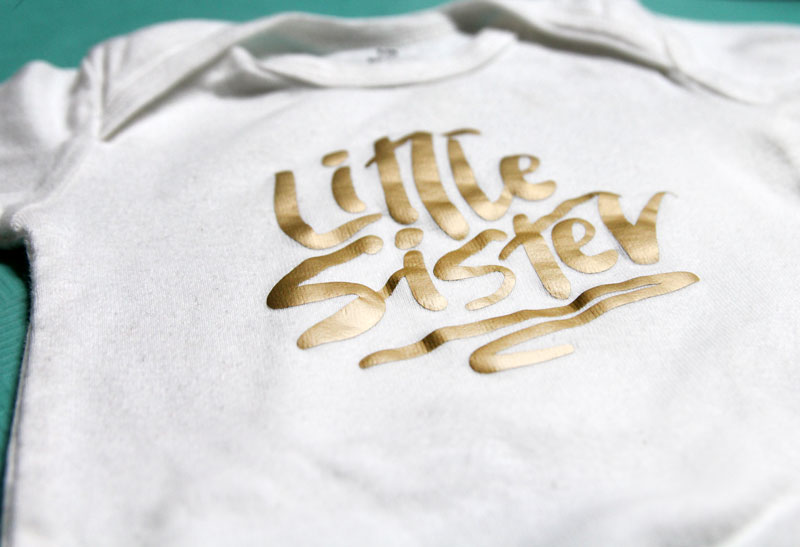
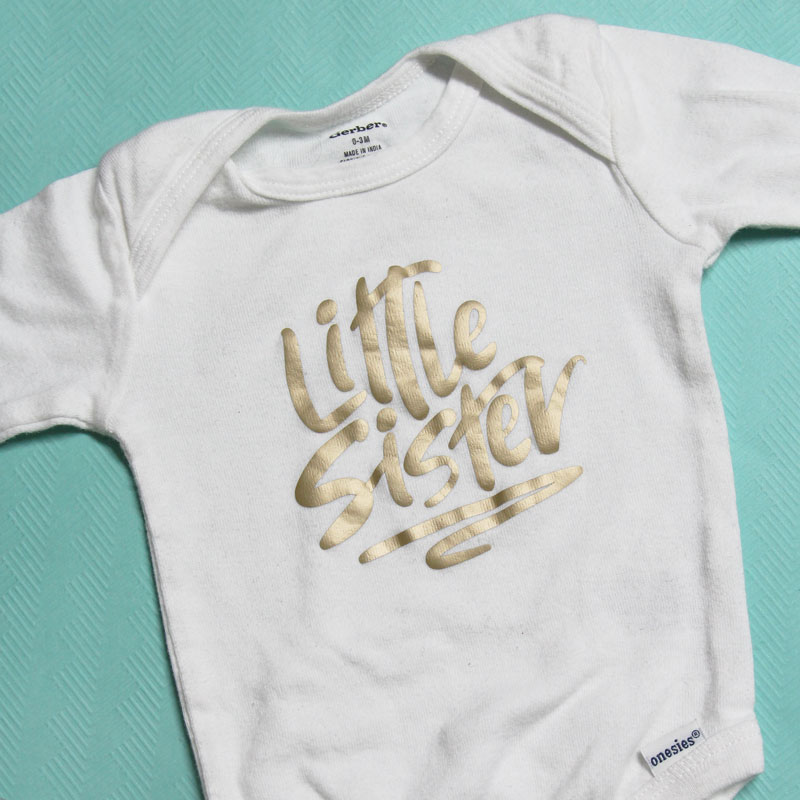
Little Sister:
We made Big Brother shirts to match, of course!
- Bodysuit: Gerber Onesies
- Iron-on: Gold from the Cricut Everyday Iron-On, Martha Stewart Metallics Collection
- Design: Access
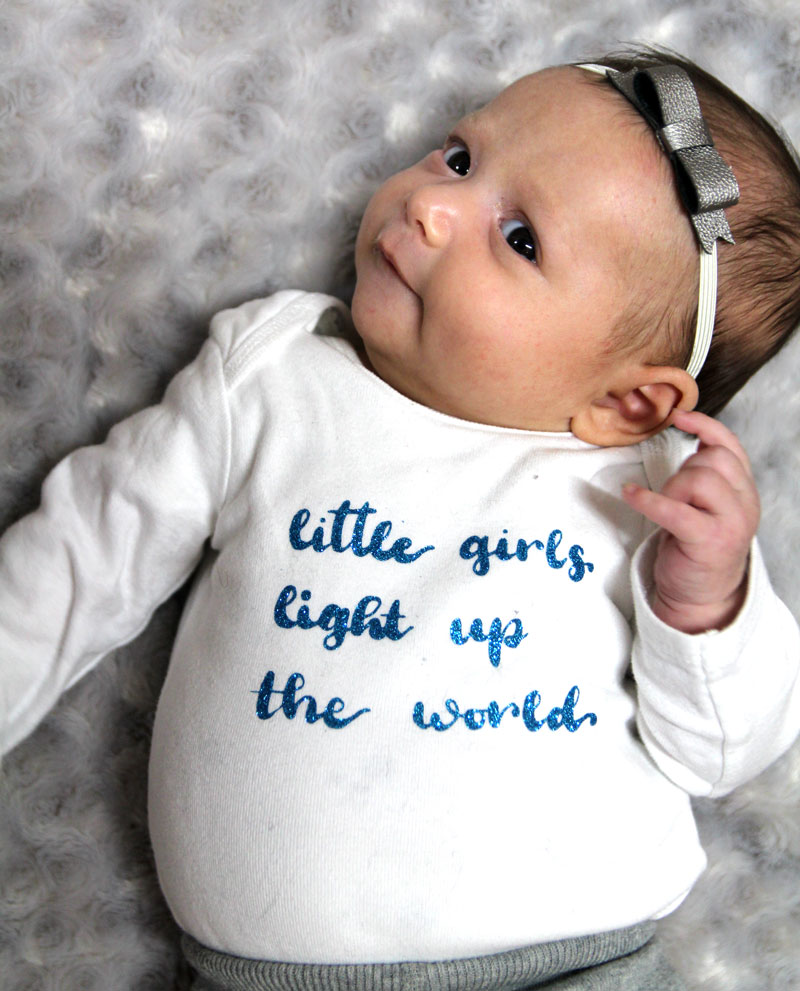
Little Girls Light Up the World:
I hand lettered this just for my princess and turned it into an SVG.
- Bodysuit: Just One You by Carters from Target
- Iron-on: Aqua from the Glitter Iron-on Sampler Bejeweled
- Design: my Etsy shop
Neutral
I need a nap:
And I need a shirt to match Princess's.
- Bodysuit: Hanna Andersson (and heavenly soft)
- Iron-on: Everyday Iron-on White
- Design: Access

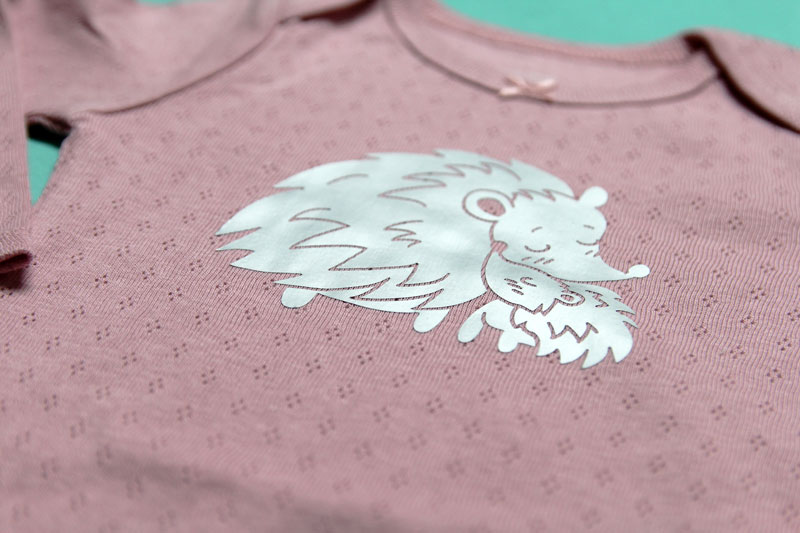
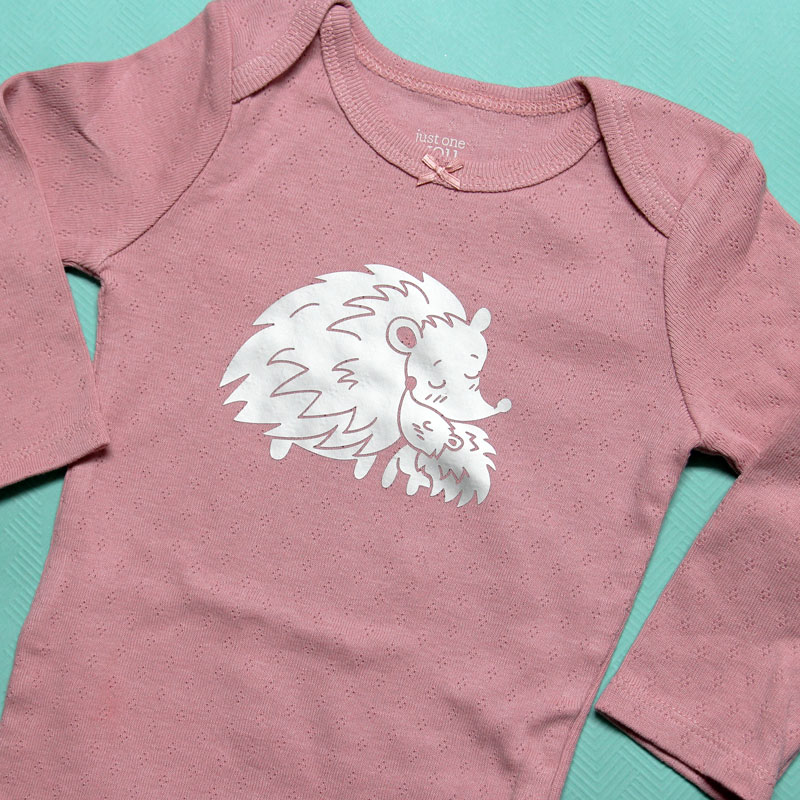
Mother and Baby Hedgehogs:
- Bodysuit: Just One You by Carters from Target
- Iron-on: Sterling from the Cricut Everyday Iron-On, Martha Stewart Metallics Collection
- Design: Access
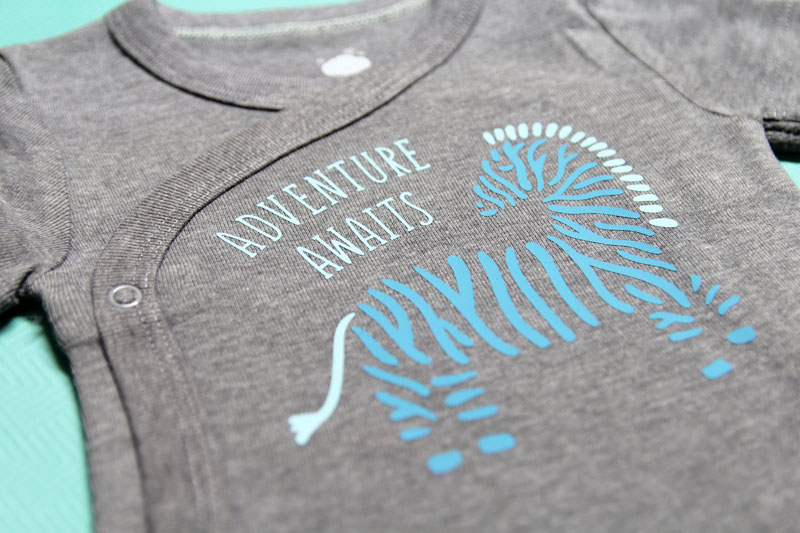
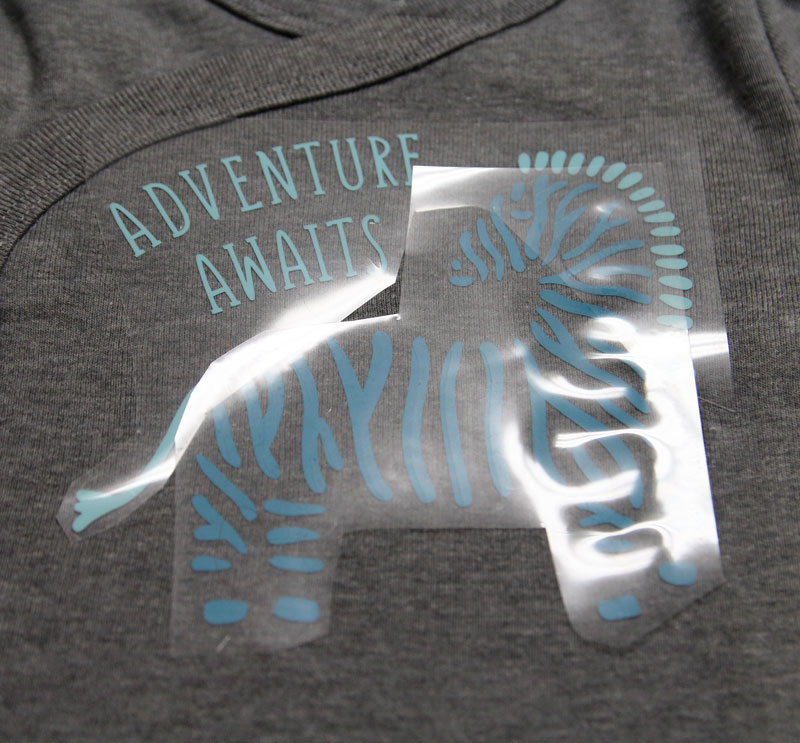
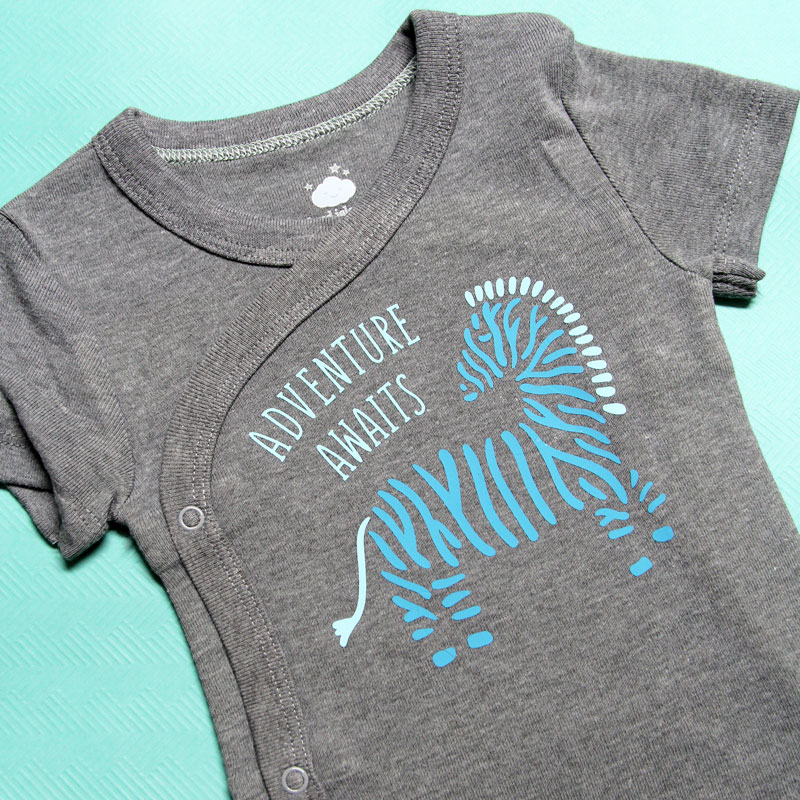
Adventure Awaits:
- Bodysuit: Cloud Island from Target
- Iron-on: Cricut Everyday Iron-on Martha Stewart Seaside Collection
- Design: Access
New to the Crew:
- Bodysuit: Hand-me-down
- Iron-on:
- Pink Glitter from the Glitter Iron-on Sampler Bejeweled
- Lilac and Pink from the Everyday Iron on Sampler , Pastels
- Design: Access
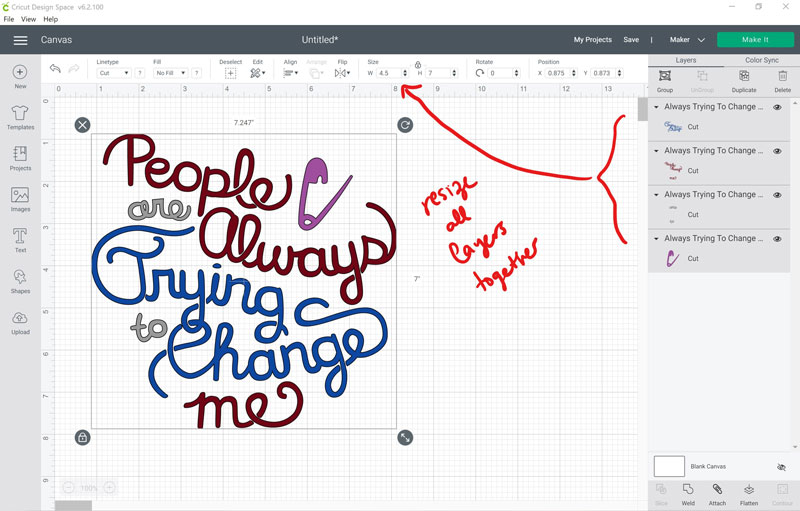
People are Always Trying to Change Me:
- Bodysuit: Just One You by Carters from Target
- Iron-on:
- Sterling from the Cricut Everyday Iron-On, Martha Stewart Metallics Collection
- Teal,Navy and Wine from the Everyday Iron -On Sampler, Boho
- Design: Access
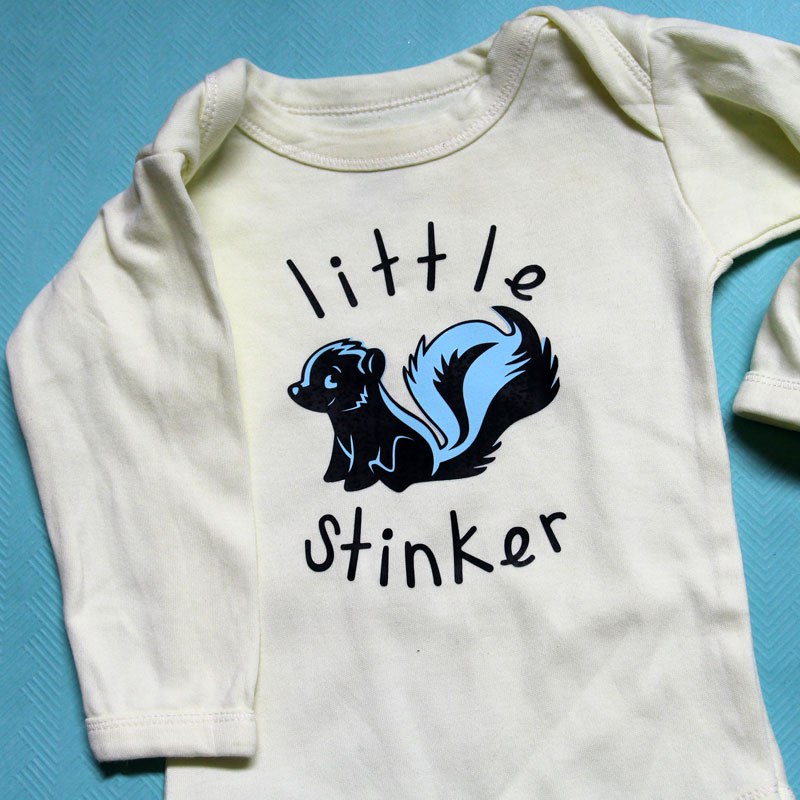
Little Stinker:
- Bodysuit: Unknown (hand-me-down)
- Iron-on:
- Everyday Iron-on Black
- Sky from the Everyday Iron on Sampler , Pastels
- Design: Access
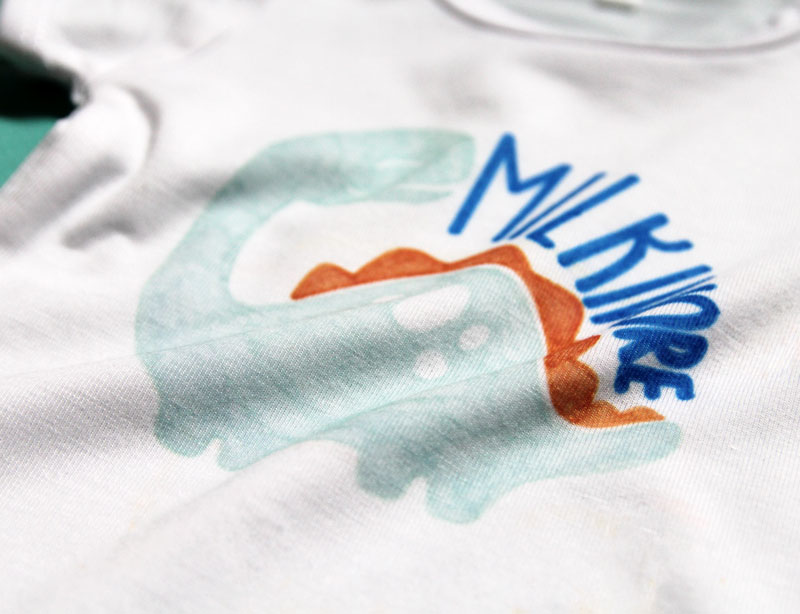
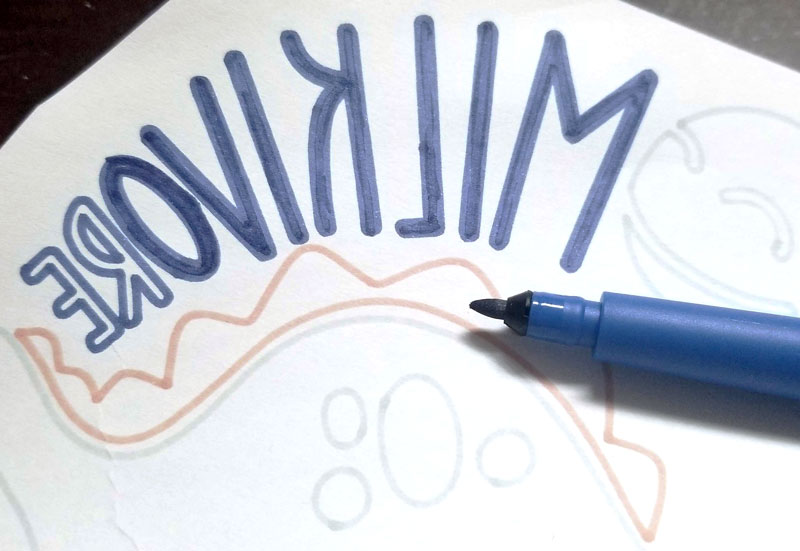
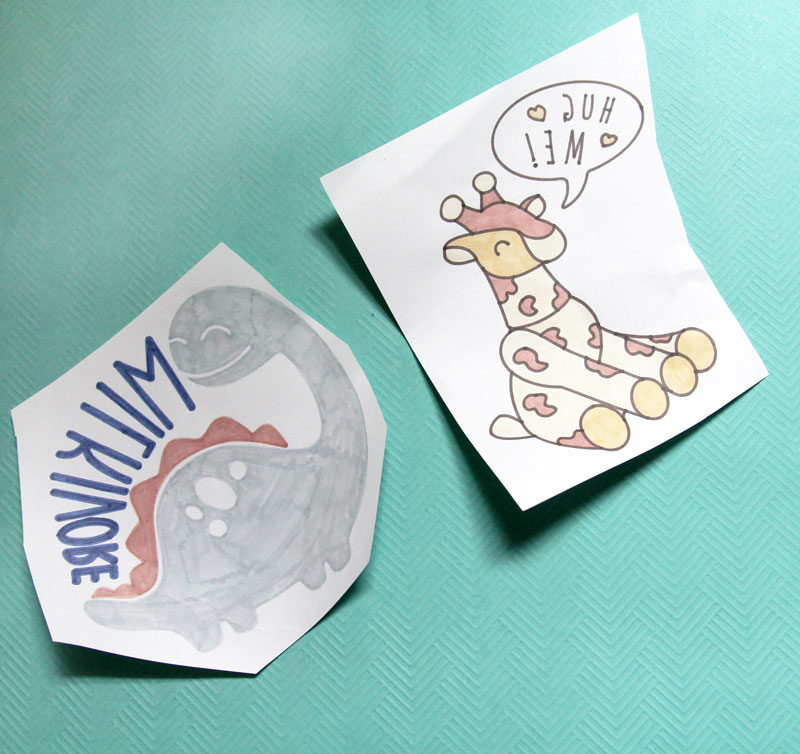
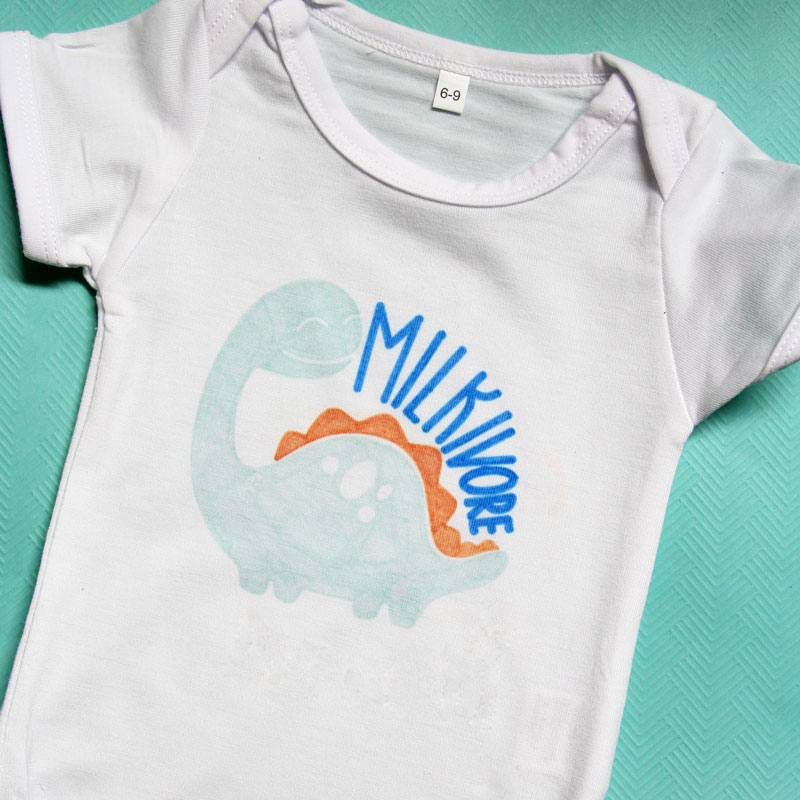
Milkivore:
They have cute designs for bottle fed babies too.
- Bodysuit: Cricut Infusible Ink Blank
- Infusible Ink Markers
- Design: Access
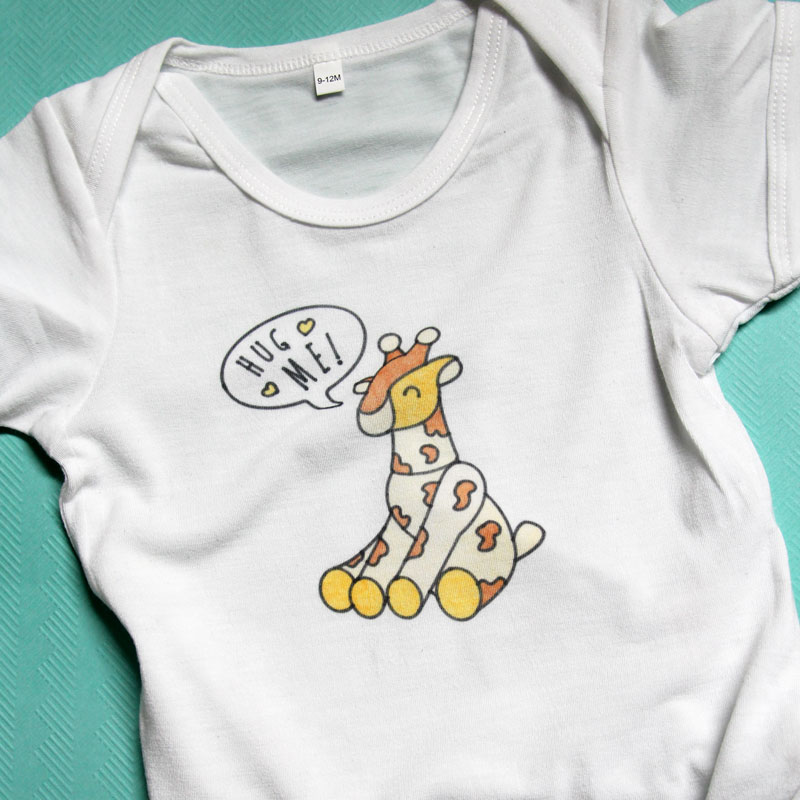
Hug Me
- Bodysuit: Cricut Infusible Ink Blank
- Infusible Ink Markers
- Design: Access
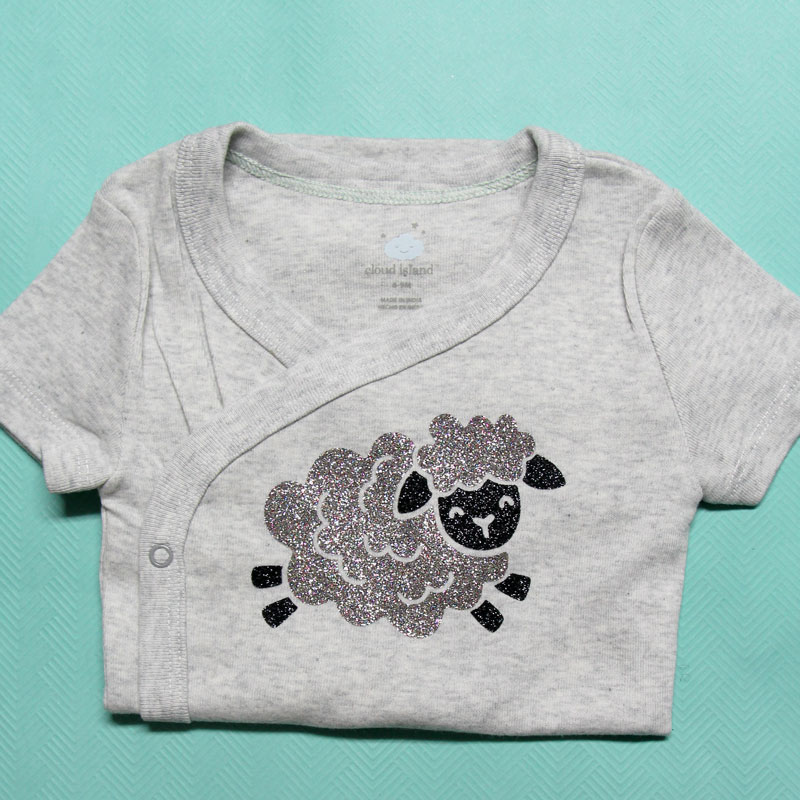
Sheep:
- Bodysuit: Cloud Island from Target
- Iron-on:
- Black from the Glitter Iron-on Basics sampler
- Multi from the Glitter Iron-on Sampler Bejeweled
- Design: Access
For girls of any age
I made these for my baby but they're really not baby specific. Most are good for younger girls – toddler through preschool.
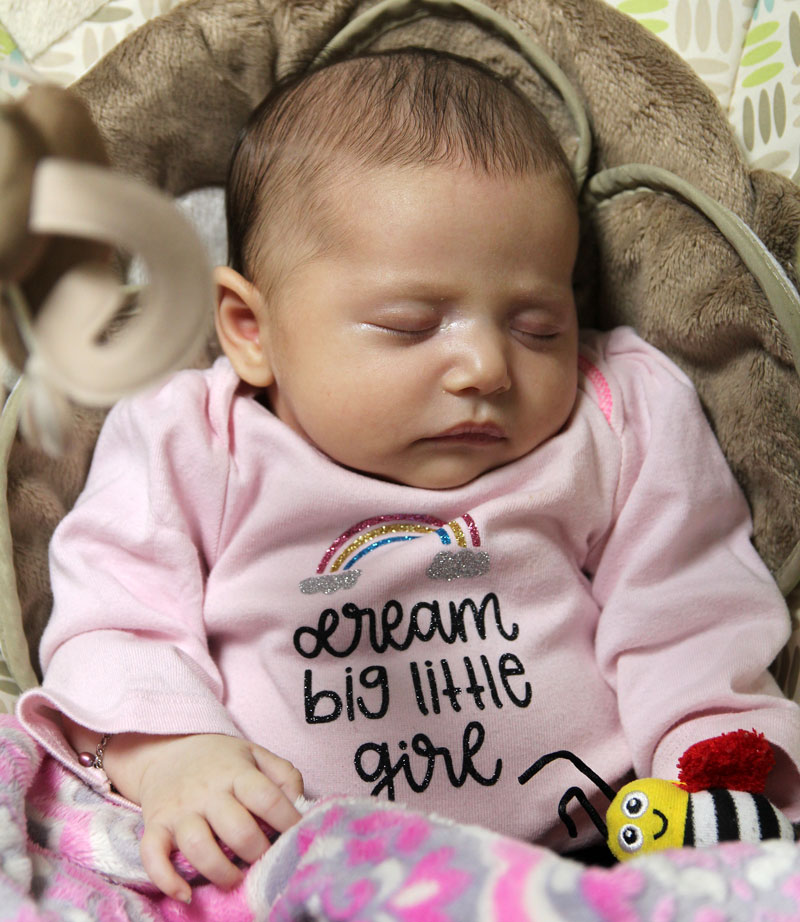
Dream Big Little Girl:
- Bodysuit: Unknown hand-me-down
- Iron-on:
- Gold and black from the Glitter Iron-on Basics sampler
- White from the Glitter Iron-on Princess Sampler
- Pink and aqua from the Glitter Iron-on Sampler Bejeweled
- Design: Access
You are my sunshine:
- Bodysuit: Baby Cat & Jack from Target
- Iron-on: The lighter blue from the Cricut Everyday Iron-on Martha Stewart Seaside Collection
- Design: Access
Gosh Being a Princess is Exhausting:
- Bodysuit: Carter's
- Iron-on: Glitter Iron-on Princess Sampler
- Design: Access
Peacock Dress:
- Dress: H&M – this one no longer exists but you can find other fun solids here.
- Iron-on: Gold from the Glitter Iron-on Basics sampler
- Design: Access
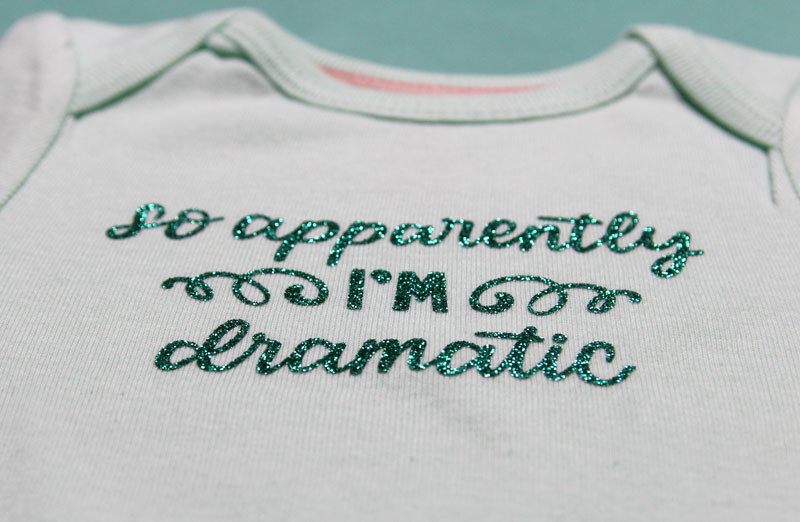
So apparently I'm dramatic:
I probably wouldn't put this past the toddler stage when they actually understand what it means…
- Bodysuit: Cloud Island from Target
- Iron-on: Green from the Glitter Iron-on Sampler Bejeweled
- Design: Access
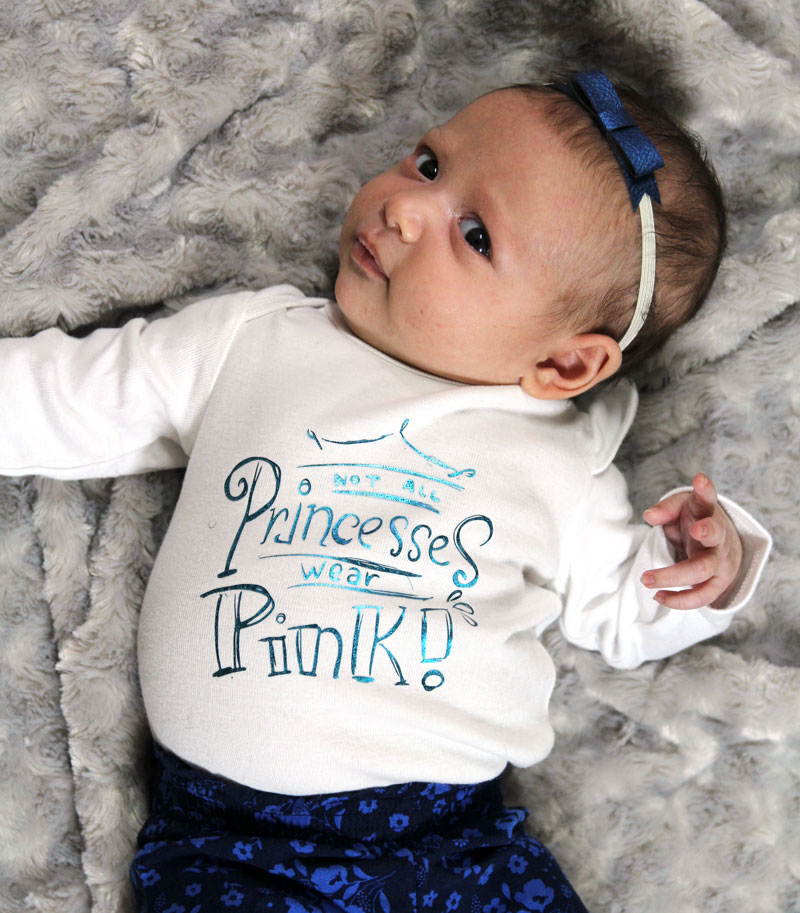
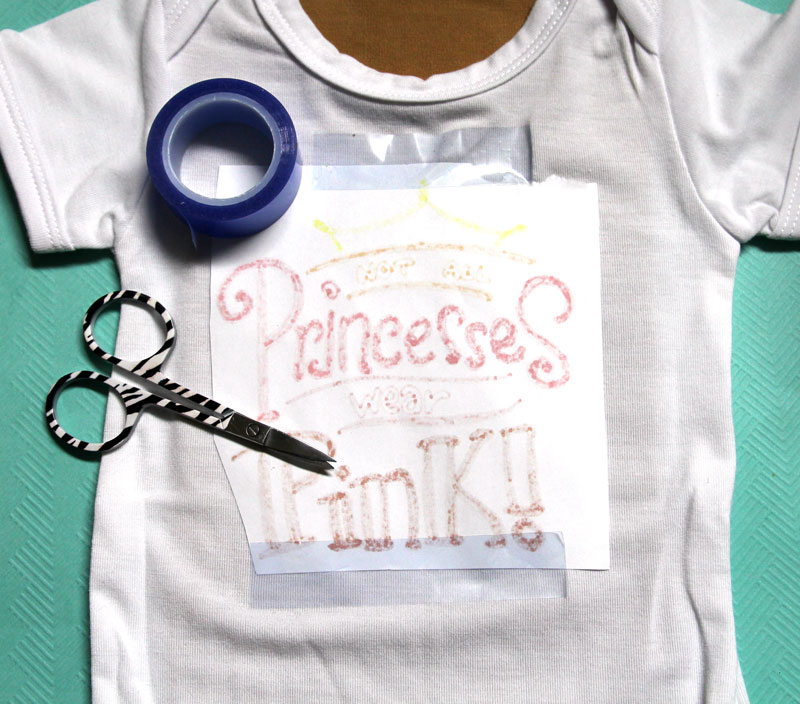
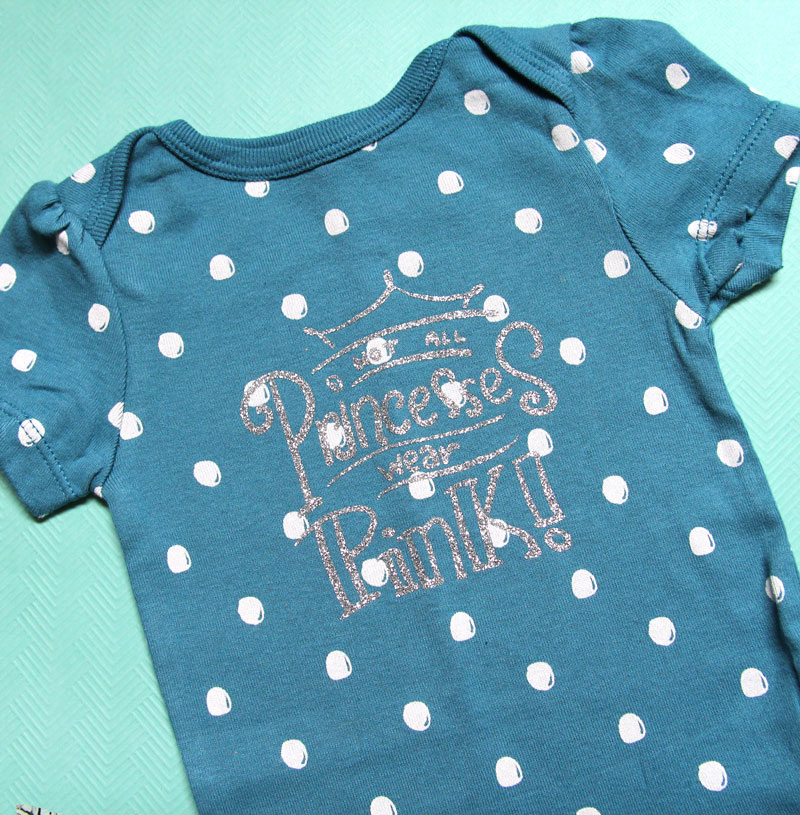
Not all Princesses Wear Pink:
I made a few variations of this shirt, including Infusible Ink. You can see those and download this SVG for girls here.
- Bodysuit: Cloud Island from Target
- Iron-on: Silver from the Glitter Iron-on Basics sampler
- Design: Free download here
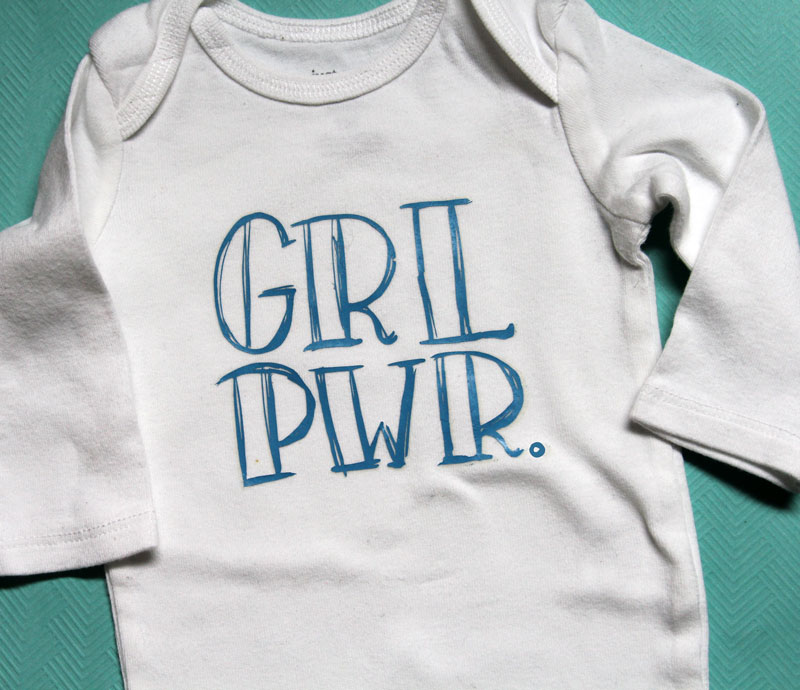
GRL PWR:
- Bodysuit: Just One You by Carters from Target
- Iron-on: The darker blue from the Cricut Everyday Iron-on Martha Stewart Seaside Collection
- Design: My Etsy Shop
What are your favorite Cricut shirts for girls? Share photos in our group or comment below!
More cool Cricut crafts
Learn how to make Cricut place cards – beautiful table decor for any occasion! You can also learn more about how to write with Cricut …
Learn how to write with the Cricut Maker, Explore Air 2, Explore 3, or Joy by making a fun color-in card for kids to give …
Make this adorable headband with Minnie Mouse ears for babies to turn a comfortable dress or bodysuit into an adorable DIY costume for infants! Find …
Learn how to make keychains with Cricut machines. These make fantastic DIY gifts and things to make and sell at home! This post contains affiliate …
No one appreciates a teacher more than a mom on the last day of summer vacation! This back to school teacher gift basket is a …
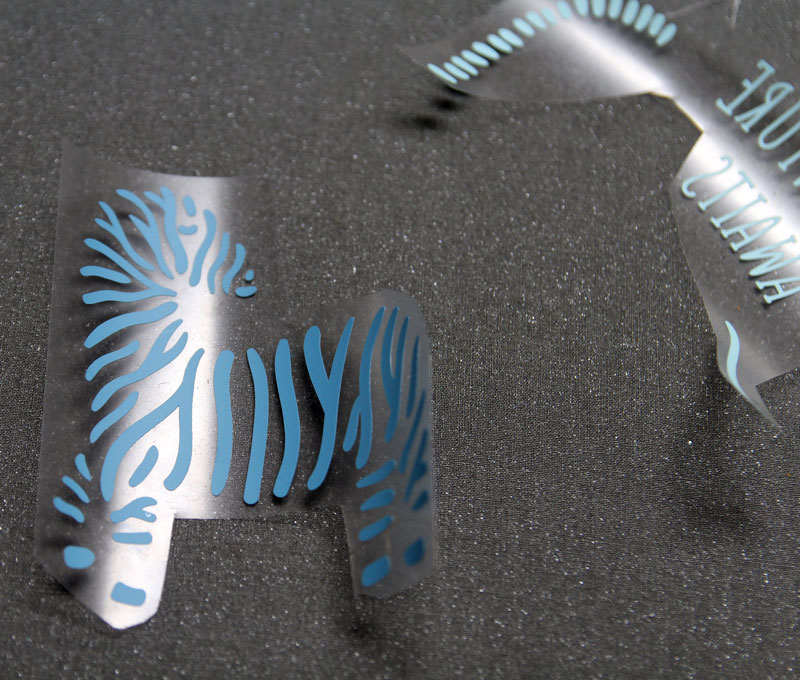
Today I'm going to be sharing with you my Cricut Maker 3 Review as well as the cool zebra print wall we made in our …
A DIY leather keychain makes a fantastic Father's Day gift for Dad – or a sweet gift for men and boys who are difficult to …
Got yourself a new crafting gadget? These things to make with Cricut will show you just how versatile it is! This post contains affiliate links. …
This Cricut machine comparison will help you figure out which Cricut is best for your specific needs. Choose between the Joy vs. Explore Air 2 …
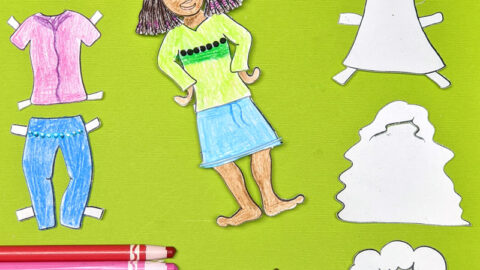
These paper doll coloring pages are fun to design and craft on your own! They make a fun craft for teens and for kids. This …
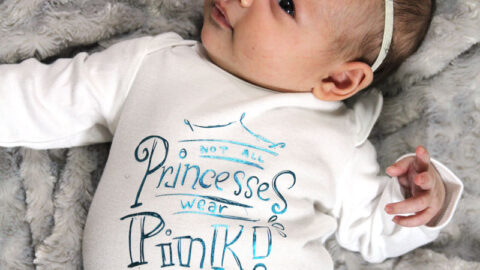
Inside: a free SVG for Girls bodysuits that says on it "Not All Princesses Wear Pink". You can also check out the free SVG that …
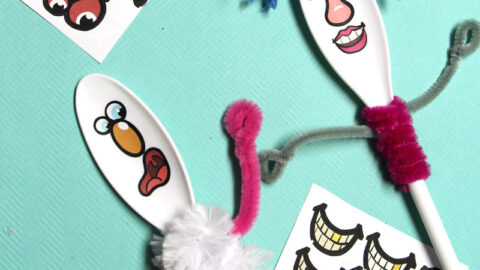
We made this fun spoon puppets craft during some long at-home weeks and it entertained my kids for hours! Grab the printable face stickers and …
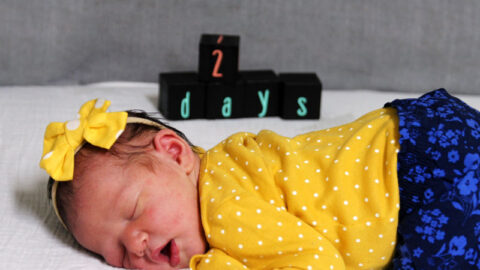
I made these crazy easy milestone blocks for babies using my Cricut Joy – but there is an alternative for you if you don't have …
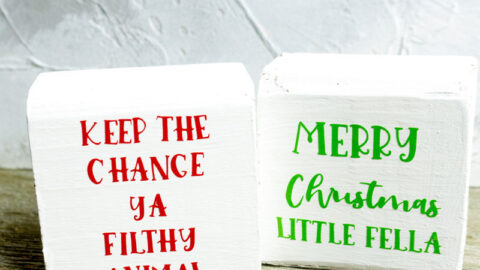
Want a quirky edge to your Christmas mantle? Add some Home Alone decor with some Christmas movie-inspired quotes! Find more simple DIY projects for beginners …
Download this free pumpkin template as a PDF or SVG to make gorgeous Halloween and Fall decor using felt, faux leather with metallic touches, or …
best cricut for making shirts
Source: https://www.momsandcrafters.com/cricut-shirts-for-girls/
Posted by: hernandezmakentance.blogspot.com
0 Response to "best cricut for making shirts"
Post a Comment