

How To Adjust Iphone Camera
Do you lot consider yourself an iPhone photographer? If yous take nearly of your photos with your iPhone, whether you are posting them on Instagram or sharing them with friends, you tin do good from experimenting with the camera settings on your iPhone.
The 10 iPhone photographic camera settings and features to master
The camera features bachelor on your iPhone volition evidently depend on which model yous're using, but even the older models have a decent camera with absurd settings. Here are 10 iPhone camera settings to play effectually with right now:
- The ultra-wide photographic camera
- Dark mode
- iPhone Camera Alive
- iPhone Portrait mode
- Optical zoom
- iPhone Camera timer
- Burst photos
- The iPhone Camera grid
- Exposure/focus lock
- iPhone HDR

The iPhone xi and iPhone eleven Pro photographic camera features
iPhone'south newest telephone models have some features nosotros've never seen until now, including the ultra-wide camera lens and Night mode. If y'all've been using the iPhone 11 or iPhone eleven Pro, check out these features. If you oasis't upgraded yet, skip to the department on features for earlier models.
1. The ultra-wide camera
The ultra-broad photographic camera on iPhone 11 and iPhone xi Pro enables users to capture a much greater field of view than the standard iPhone photographic camera lens and is equivalent to a focal length of 13mm. This lens is useful for shooting landscapes when y'all want to capture the scale and magnitude of a scene, as well as urban streetscapes, architecture, and building interiors.
How to utilize iPhone's wide-angle lens
- Open the Camera app on your iPhone 11.
- Tap 0.5x simply above the shutter button on the screen to enable the ultra-wide camera.
- If you press and hold ane of the zoom buttons, y'all can adjust it even further, between .5x for ultra-broad and 2x for telephoto.
- Agree your camera steady as you tap the shutter button. This is especially important when using your ultra-wide photographic camera considering it doesn't have built-in image stabilization like the other two lenses.
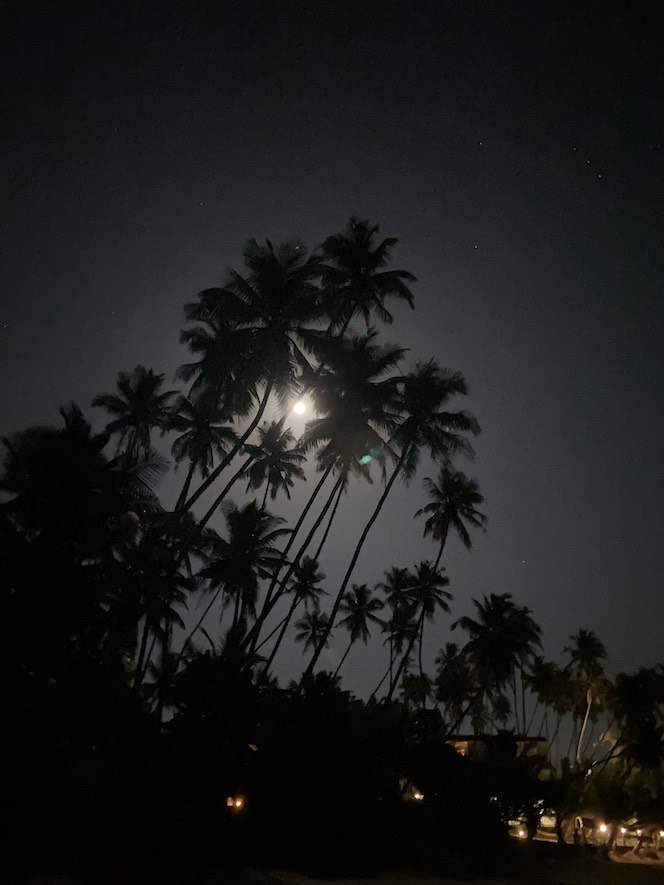
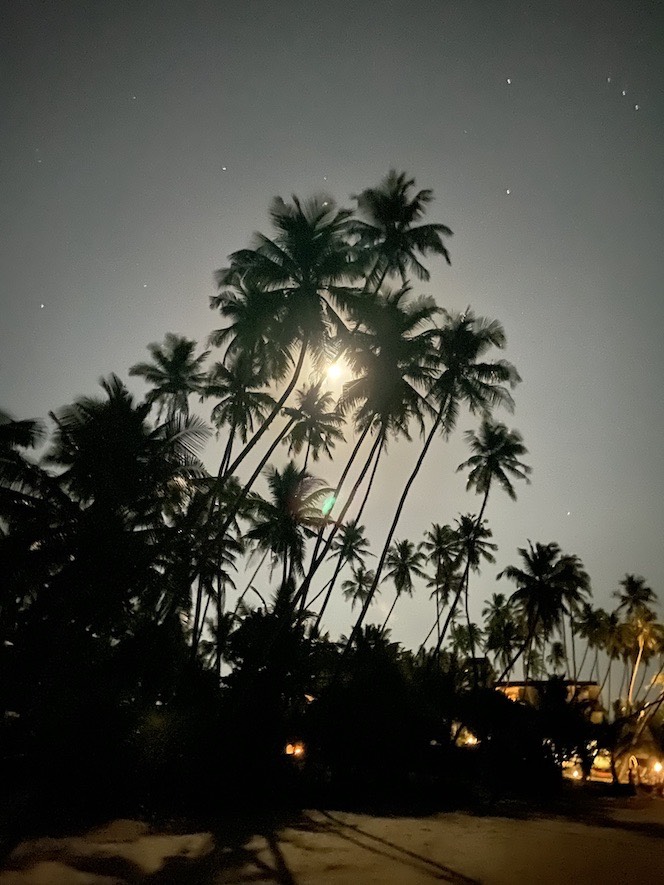
ii. Night mode
Night mode on iPhone 11 and iPhone eleven Pro is great for shooting in low-light settings where most cameras would produce blurry photos. Information technology will automatically take a series of photos at unlike exposures for a set amount of time and and so pull elements from all of the frames to create 1 crisp image.
How to utilise iPhone's Night mode
Night mode is an automatic feature that turns on whenever y'all endeavour to take a photograph in less than optimal lighting. Information technology can just be used with the standard broad-angle camera, not the telephoto or ultra-broad lenses.
Tapping the moon icon in the upper corner of your screen within the camera app will permit yous to access the Dark manner settings, where you lot can cull to plough the feature off entirely or set the amount of fourth dimension you want the shutter to remain open for your photograph. If you lot don't adjust these settings, your iPhone volition utilise its processor to automatically adjust the settings to suit the lighting weather condition.
Crucial iPhone camera settings on earlier iPhones
Earlier iPhone models may not have all the latest bells and whistles, but they still accept lots of features and settings that you tin utilize to take crawly photos. Here's an overview of some of the camera settings you'll desire to check out.
3. iPhone Photographic camera Live
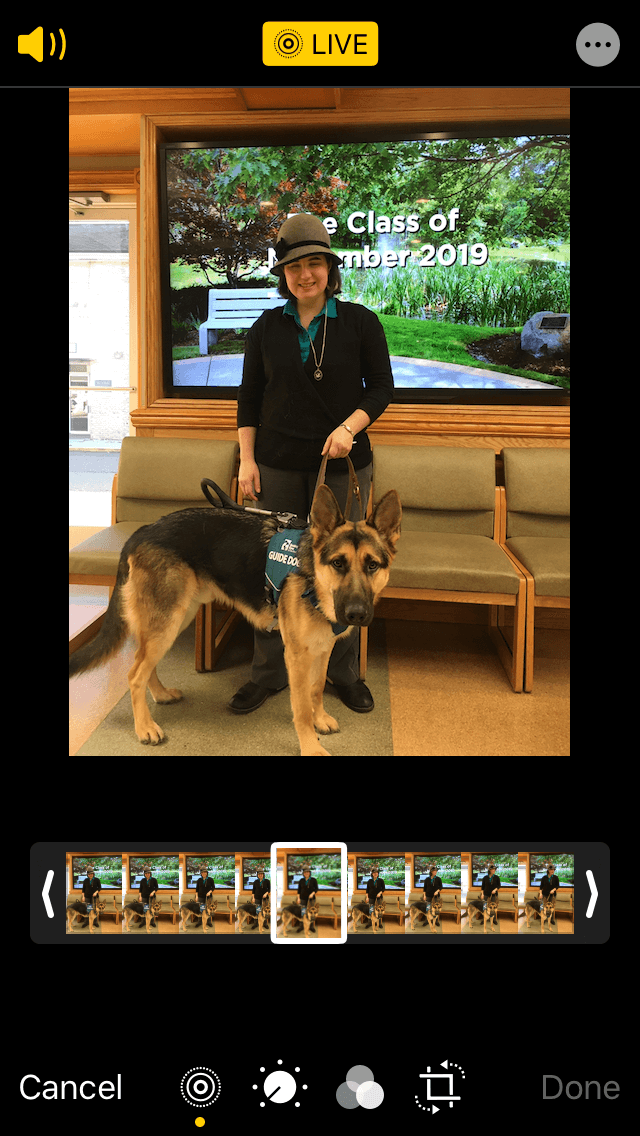
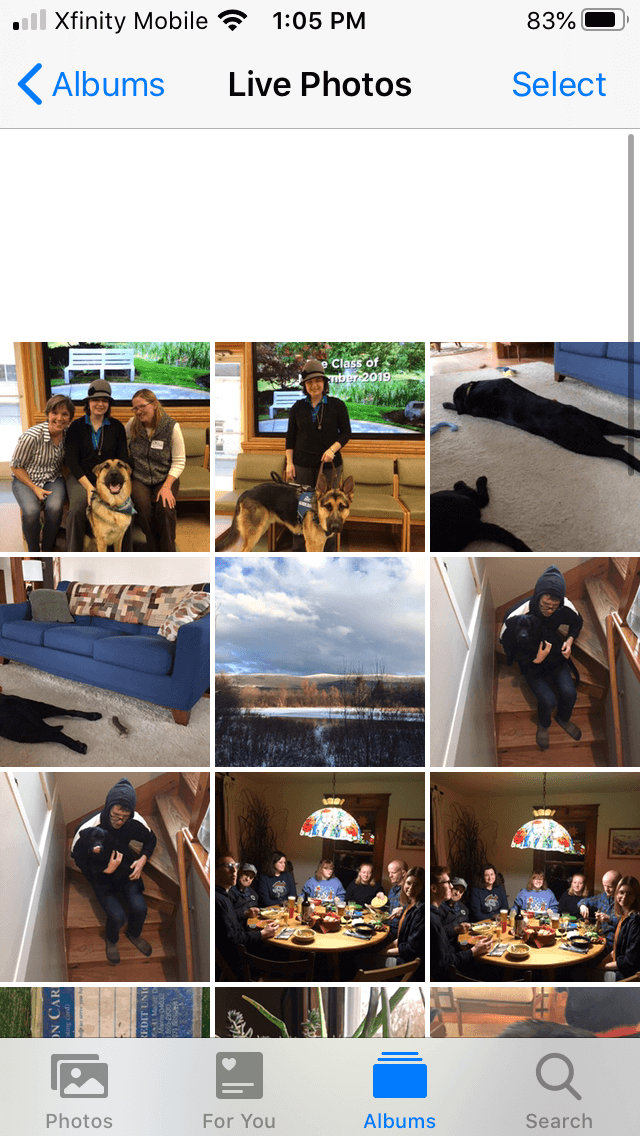
Alive Photos is a feature that allows photographers to accept a brusk three-second video that captures motility, sound, and nevertheless frames on your iPhone. Information technology'due south a standard feature on every iPhone model starting with the 6S, and information technology is the default camera setting for the iPhone 6S, iPhone 6S Plus, iPhone SE, iPhone vii, and iPhone 7 Plus. Alive Photos are peachy for capturing photos with movement or group photos where you lot want to ensure that everyone is looking at the camera.
How to utilise Live Photos
- Open the Camera app on your iPhone.
- Tap on the Live Photos icon at the top of your screen, which looks like a series of concentric circles. The icon will be highlighted in yellow when it is activated.
- Your Live Photo will be automatically saved to your Photos library.
- You can admission all of your Live Photos by borer Albums within your Photos library and scrolling downward to Live Photos.
Bank check out our in-depth iPhone Live photos guide to find out more about this underrated feature.
iv. iPhone Portrait mode
Portrait mode tin can be used to accept portraits, selfies, and photos of objects that stand out from the background by gently blurring the background and keeping the discipline thing crisp and clear. This is particularly useful when you are trying to capture a portrait in front of a distracting or chaotic background.

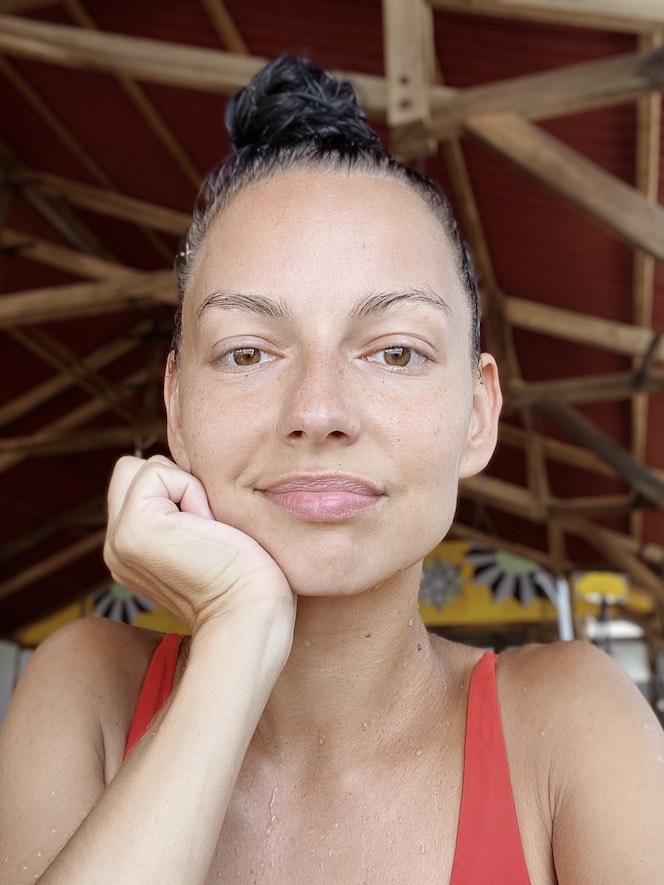
Portrait way was rolled out with the iPhone seven Plus and is available on the iPhone 8 Plus, iPhone X, iPhone XS, iPhone XS Max, iPhone XR, iPhone xi, iPhone 11 Pro, and iPhone 11 Pro Max.
How to use iPhone's Portrait way
- Open your Photographic camera app on your iPhone.
- A selection of shooting features volition appear above the shutter button. Ringlet through and tap Portrait.
- Make certain your bailiwick is 2 to 8 feet from your camera before borer the shutter button.
five. The optical zoom
If you are shooting with an iPhone 7 Plus or later model, you can make apply of the optical zoom characteristic, which allows you to zoom in on an object without a loss of quality. This is a far meliorate style to zoom than using the digital zoom (which you access past spreading your pinched fingers outward across the screen).
How to use the optical zoom on iPhone Camera
- Open your iPhone's Camera app.
- You volition see 1x above the shutter push button.
- Tap the 1x to toggle to 2x, which will zoom in closer to your subject area.
- If you concur your finger on the 1x, you can adjust the zoom settings, merely this will implement your camera's digital zoom and will event in a lower quality photograph.
- Tap the shutter button to accept a photograph.
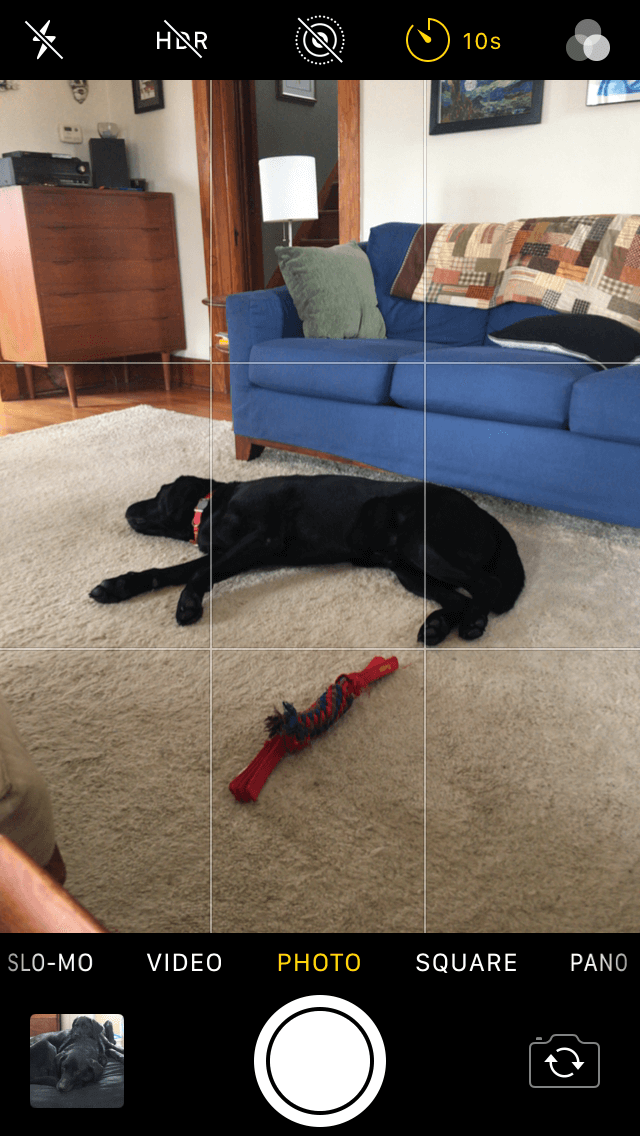
6. iPhone Camera timer
The iPhone Camera timer was one of the Camera app's primeval features and is available on all iPhone models. The timer is useful for capturing selfies or group photos where the lensman is to be included. The timer can also be used to reduce shake when taking photos in low-calorie-free settings.
How to use iPhone'due south photo timer
- Open the Camera app on your iPhone.
- If you are trying to take a selfie or group photograph, attach your iPhone to a tripod and frame your shot without you in it. Leave room in the frame for where y'all want to position yourself.
- Tap the timer icon at the top of the screen. (Information technology looks similar a clock with only one hand.)
- Choose 3 or 10 seconds. If you want to exist in the photo, cull ten seconds to give yous plenty of time to pose yourself. If yous're trying to reduce camera shake, 3 seconds is fine.
- When yous are gear up, tap the shutter push. The camera will count downward and have a photo afterwards 3 or x seconds.

7. Burst photos
Flare-up photos allow y'all to capture and salve photos of fast-moving subjects then you lot tin choose the all-time one later on on. In Burst fashion, your camera captures images at x frames per second. When you are finished recording your photos, you tin can roll through them to find your favorite shots.
How to use the Outburst feature on iPhone
Burst mode for iPhone works differently depending on which model you have. If you lot are using an iPhone XS, iPhone XR, or earlier model, all yous have to exercise is hold down the shutter button to enable Flare-up mode. With these phones, Burst mode volition not piece of work if you are also using the timer, HDR, or the flash.
If you are shooting with the iPhone 11, iPhone 11 Pro, or iPhone 11 Pro Max, simply slide the shutter button to the left when taking a photo to activate Flare-up mode.
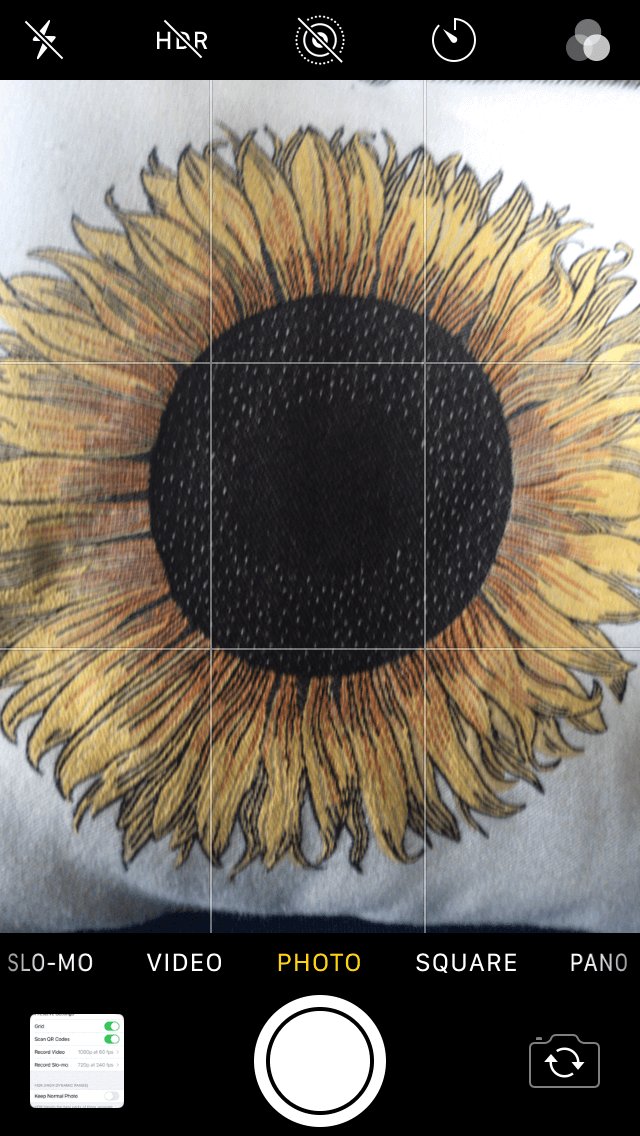
eight. The iPhone Camera filigree
Did you know y'all can set gridlines within your Photographic camera app to assist you lot frame a more than pleasing composition? Gridlines divide your screen into thirds both horizontally and vertically. Once you've used it for a while, you'll hardly fifty-fifty discover it's there.
How to turn on gridlines on iOS Camera
- Go to your Settings on your iPhone and tap Camera.
- Toggle on Grid.
- Frame your photo using the gridlines to make sure your horizon is direct and the elements in your photograph sit along the lines on your screen.

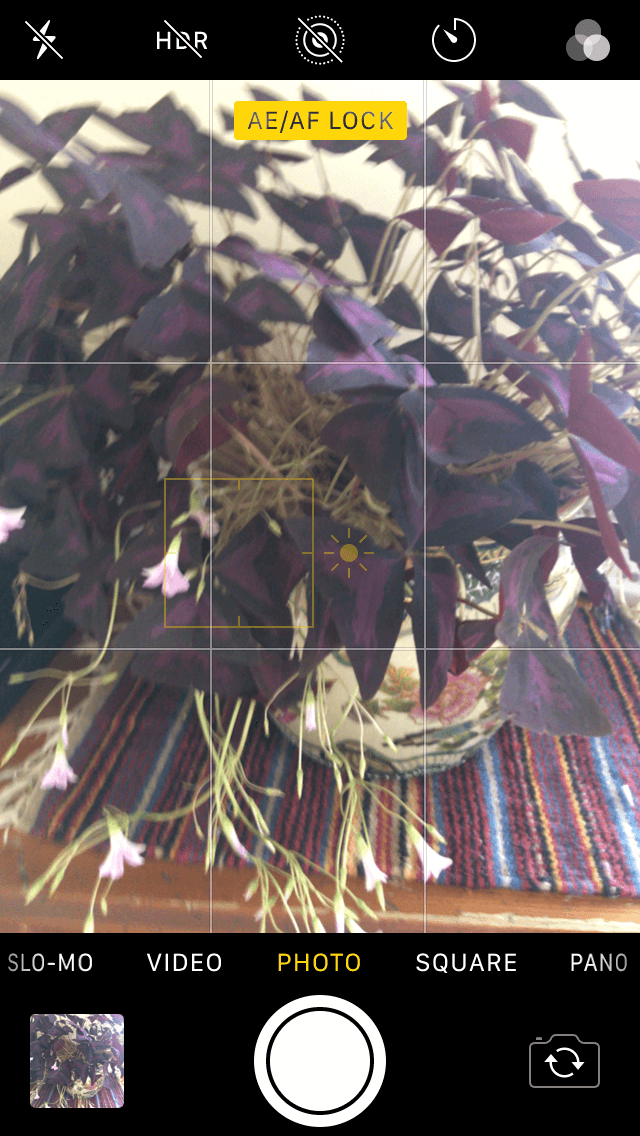
ix. Exposure/focus lock
Your iPhone camera comes with a cool feature that allows you to automatically choose and lock your focus and exposure when shooting your photo. If you do not choose your focus and exposure, the iPhone volition exercise it for you, but the results may non always be what you're expecting. The AE/AF Lock (Automobile Exposure/Automobile Focus Lock) feature enables yous to set your focus and your exposure and so lock in your settings for the electric current photo.
How to lock focus and exposure on iPhone Camera
- Open up your Camera on your iPhone and frame your shot.
- Detect the part of your photograph that you want your camera to focus on and tap information technology on your screen. This will ready your focus.
- If you want to alter the exposure, you lot tin slide your finger up for lighter and down for darker.
- To lock your focus and exposure, hold your finger down on the yellow square on your screen. Now, even if your field of study moves, it will remain in focus.
- Tap the shutter push to have a photograph.
10. iPhone HDR
HDR stands for High Dynamic Range, and using it allows yous to create properly exposed photos in all sorts of tricky lighting conditions. Your iPhone uses HDR to take a series of photos that highlight different areas of the scene you are shooting. HDR will give you lot more than detail in the shadows and bright highlights that aren't washed out. It's great for landscape photography, bright sunlight, and street scenes.
How to use HDR on iPhone Camera
The following instructions are for iPhone models earlier than iPhone X models. Newer models have Smart HDR, which is used automatically in scenarios when it would exist most effective:
- Open the Camera app on your iPhone.
- At the superlative of the screen, you will see an HDR icon. Tap it and and so tap On.
- Frame your shot and take your photograph by tapping the shutter push button.
Using your iPhone camera settings correctly volition drastically amend the quality of your photos. Fortunately, these settings are super easy and intuitive to utilise, even for novice photographers.
Source: https://backlightblog.com/iphone-camera-settings
Posted by: hernandezmakentance.blogspot.com
0 Response to "How To Adjust Iphone Camera"
Post a Comment